I have long been interested in cell phone photography as a way students could learn about GPS and GIS. The capabilities of our phones in this regard are probably now taken for granted and consequently ignored as a learning opportunity. If anything, the capability of connecting the phone to a location marked in captured images may be considered a security risk rather than a capability to be applied when useful.
Global Positioning Systems (GPS) and Geographic Information Systems (GIS) allow the investigator to search for interpretations of data related to place. GPS uses the signals from multiple satellites to allow an individual with a GPS device (hardware) to determine the location of the GPS device (place) in terms of precise latitude, longitude, and altitude. Put another way, the device allows you to determine exactly where you are standing on the earth. Typically, your position can be determined with greater than 10-foot accuracy. You may be familiar with GPS navigation because you have GPS hardware installed in your car or perhaps your phone. These devices know where you are and can establish a route between where you are and where you would like to go. The most basic function of a GPS is to locate the device in three-dimensional space (longitude, latitude, and altitude), but most map location (show location on a map), navigate, and store data (e.g., the coordinates of designated locations). Smartphones do so using true GPS (using the signals from satellites) but may also determine the location of the phone by calculating the phone’s location to multiple cell phone towers. The triangulation process with the cell towers is similar to that dependent on satellites but less accurate.
GIS is a software tool that allows the user to see the relationship between “layers” of information. In most cases, one layer is a map. Other layers could be the presence or quantity of an amazingly diverse set of things— e.g., voters with different political preferences, cases of a specific disease, fast food stores, a growth of leafy spurge, or nitrate concentration in water. The general idea is to expose patterns in the data that allow the researcher to speculate about possible explanations.
With the addition of specialized software, some GPS devices and smartphones provide similar capabilities. The device knows your location and can identify restaurants, gas stations, or entertainment options nearby. The field of location-based information is expanding at a rapid pace. One approach involves providing useful, location-specific information. For example, how close am I to the nearest gas station? A second approach allows the user to offer his or her location as information. Being able to locate a phone can be useful if the phone is lost and some applications allow parents to locate their children using the location of the phone the child is carrying. Sometimes, individuals want to make their present location available in case others on a designated list of “friends” may be in the vicinity providing the opportunity for a face-to-face meeting. Obviously, there can be significant privacy concerns related to sharing your location.
A great example of student use of GPS, GIS, and the Internet is the GLOBE program (http://www.globe.gov/). GLOBE is an international program led by a collaborative group of U.S. federal agencies (NOAA, NSF, NASA, EPA). Over 140 colleges and 10,000 schools from over 90 countries are also involved. GLOBE involves students in authentic projects led by scientists in the areas of air quality, land cover, water quality, soil characteristics, and atmospheric sciences.
In the GLOBE program, students in classes taught by specially trained teachers work with scientists to collect data according to precisely defined protocols. The advantage to the scientists is the massive and distributed data collection system made available by the Internet. Data gathered from precise locations (identified with GPS) can be integrated (with GIS) on an international scale. Students have access to educational materials and learn by contributing to authentic projects.
The GLOBE projects are presented in ways that have local relevance and have been matched to K–12 standards. While the topics of study most closely address standards in the areas of math and science, the international scope of the project also involves students with world geography, diverse cultures, and several languages (the project home page is available in seven languages). The data are also available online, and groups of educators are encouraged to propose and pursue related projects.
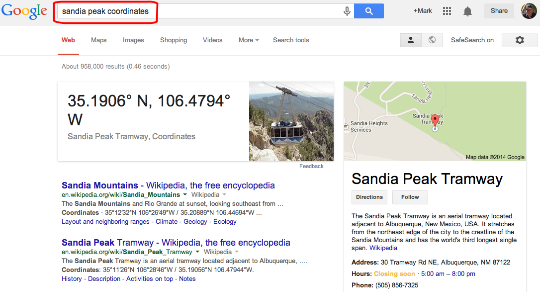
Readily available software and hardware also allow educators to design projects that are not dependent on formal, large-scale programs. We all have become much more familiar with GPS devices and many of us own navigation or phone devices that could be used in educational projects. Digital cameras tag images with GPS coordinates. Once we have a way of determining location, we might then consider what data we can match to location. Fancy equipment is not always necessary. Sometimes the data are what we see. Do you know what a Dutch Elm tree looks like? Have any Dutch Elms in your community survived? Where are they located? There are also many easy ways to use location to attach data, in this case photos, to maps. For example, Google Photos offers some amazing capabilities. If you store cell phone pictures in Google Photos, try searching for a location (e.g., Chicago). Google Photos knows where some things are located (e.g., the Bean), but will also return photos based on the embedded EXIF data that includes GPS information.
Probes you may already own, your phone and data collection
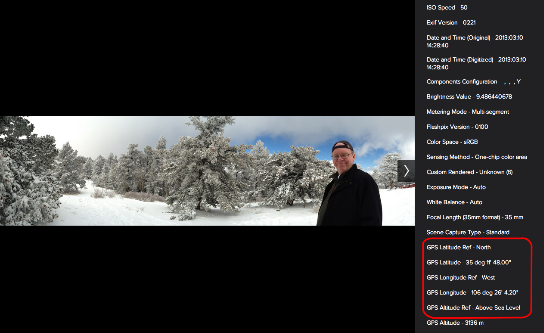
Your cell phone has an interesting feature. It can store the exact location from which each picture was taken and other information with the same file containing the image. These data are stored as part of EXIF (exchangeable image file format). You may know that some images are accompanied by information such as the camera used to take the picture, aperture, shutter speed, etc. This is EXIF data. The longitude and latitude (I can never remember which is which) can also be stored as EXIF data.
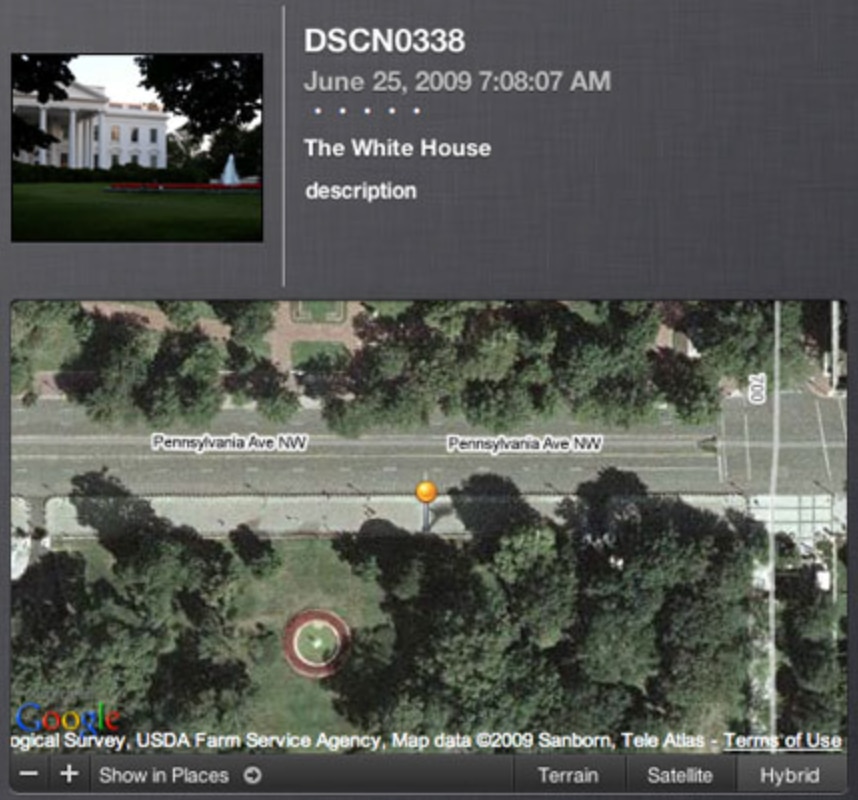
I have a record of my first experience exploring these capabilities. I was using a camera with GPS capabilities rather than a phone, but it is the personal insights about capabilities that resulted that are relevant here. In was 2009 and my wife and I were in Washington, DC, for a conference. We spent some time visiting the local landmarks and I took the following picture. As you can see, we were standing at the fence that surrounds the White House and I took the following photo. I think tourists would no longer be allowed in this location, but that was a different time.

I used the EXIF data to add the photo to Google Maps. In the following image, you can see the image and the mapped location in street view. At first the map information confused me – no white house. Then I realized, we are standing on Pennsylvania Ave. on the other side of the fence shooting through the trees to frame the picture. We were the pin looking through the fence, over the flower bed, toward the White House. I have often said I have a different understanding of technology because I have always been a heavy tech user and experienced life as technological capabilities were added. I was there before and after and thus have a sense of how things changed. When technology capabilities are already there you often learn to use them without a need to understand what is happening and without a sense of amazement that can motivate you to seek understanding and creative applications.
Mapping photo collections with Google services
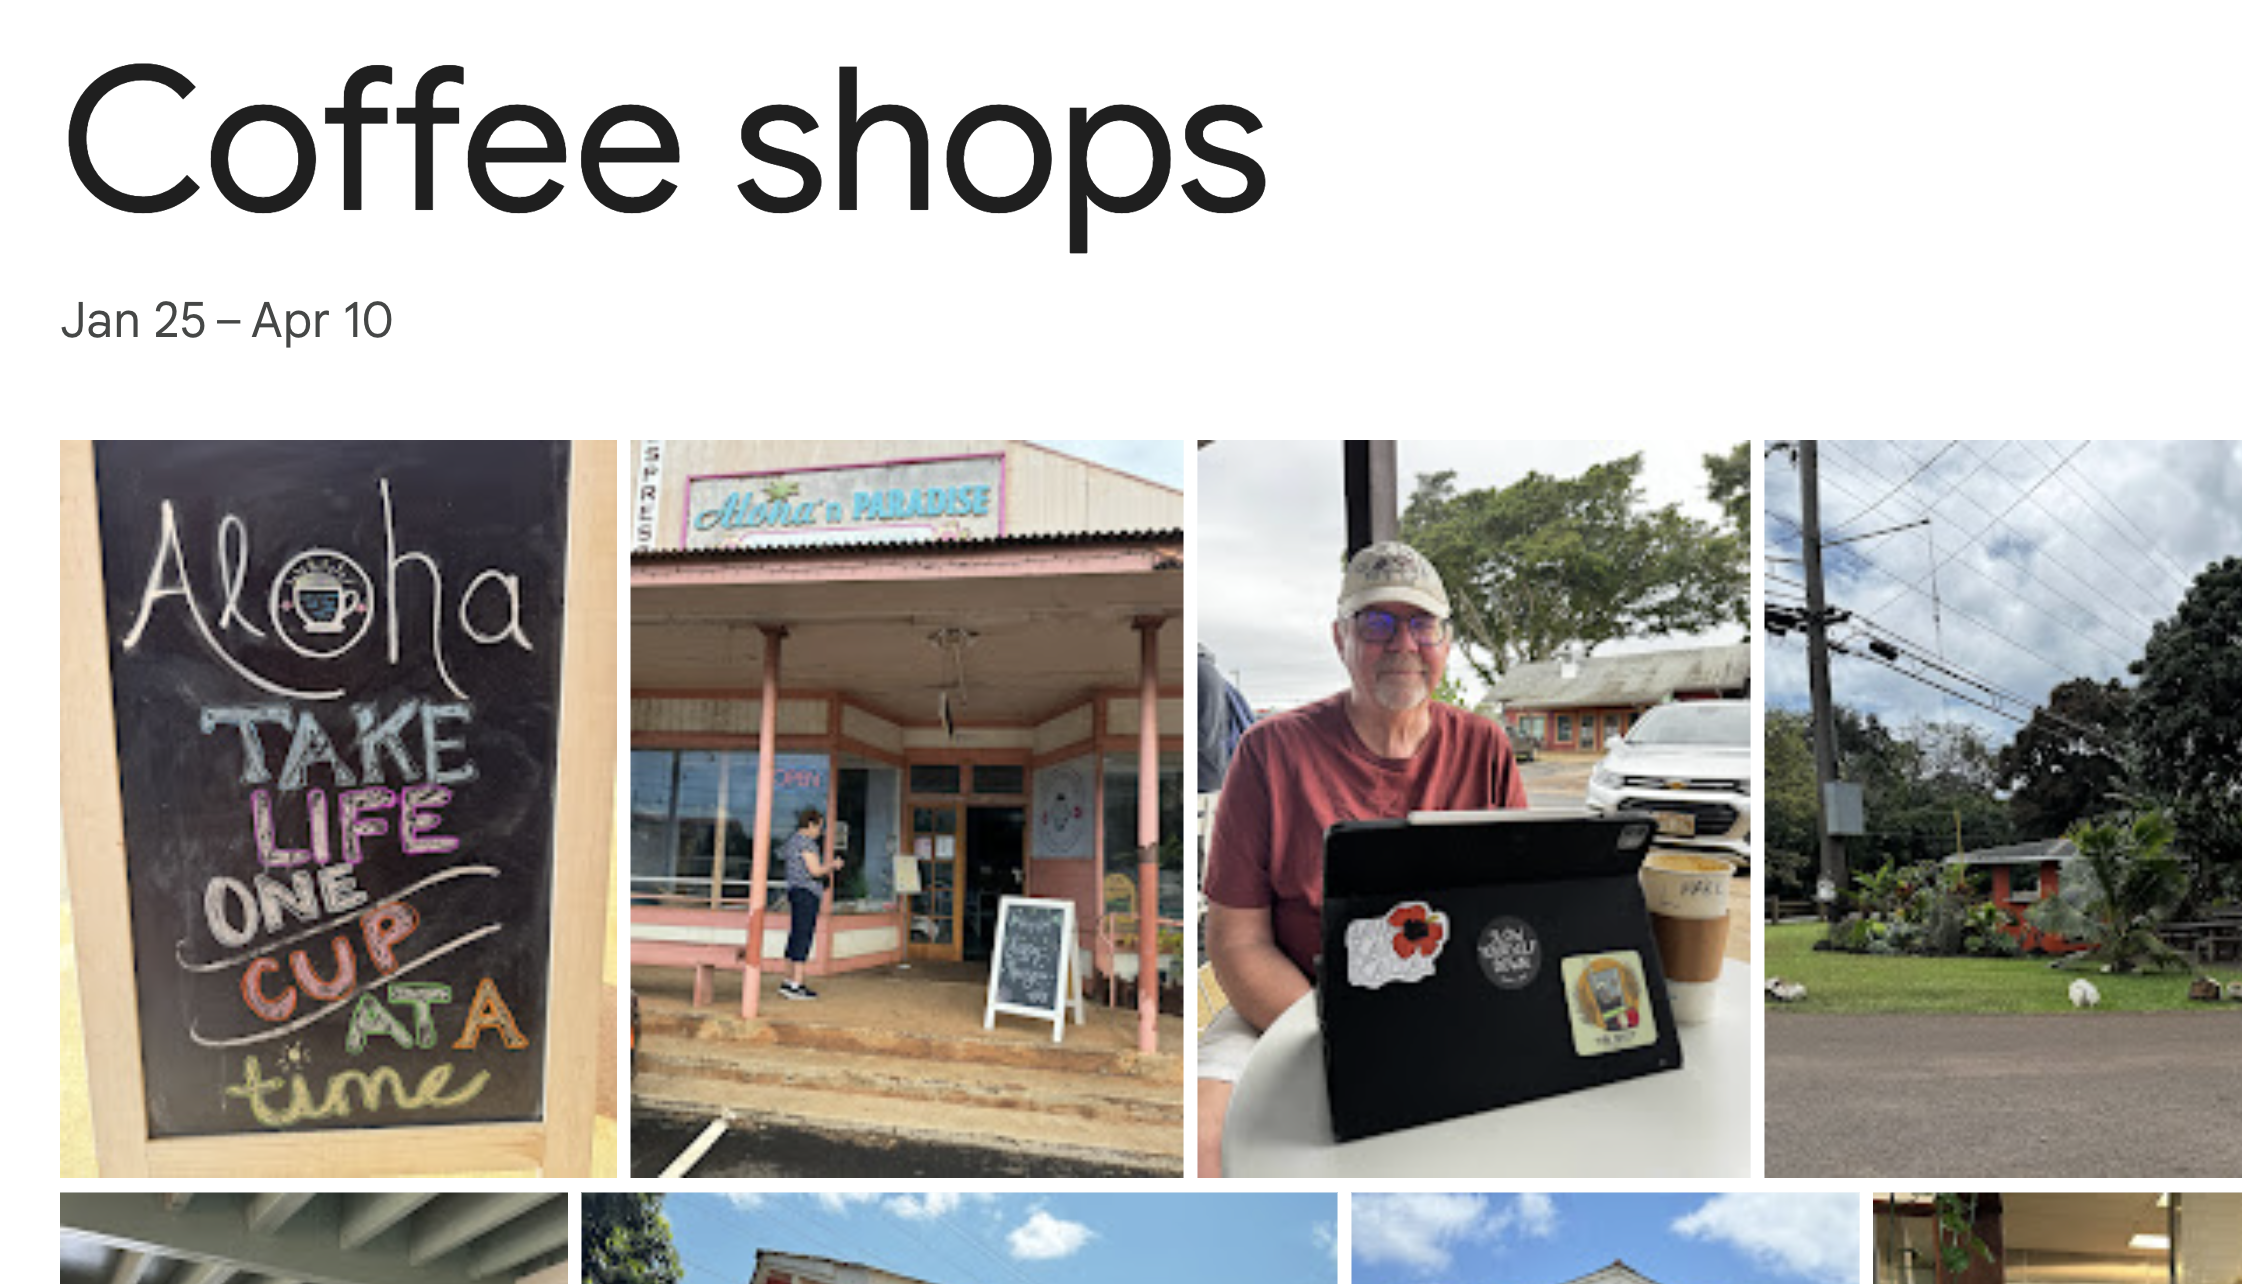
The following is a tutorial. The specific example that is the basis for the tutorial is not intended to be relevant to classroom use, but the example is authentic and the processes described should transfer. Now retired, we were wintering in Kauai when I decided to write this post. I do a lot of reading and writing in coffee shops and I had decided to begin collecting photos of the various shops I frequented. Others would probably focus on tourist attractions, but coffee shops were the feature that attracted me.
Mapping photos in Google is best understood as using two interrelated Google services – Google Photos and Google MyMaps. If you are cost conscience and are not interested in advanced features or storing a lot of images, you can get away with the free levels of Google tools. The two-stage process involves first storing and isolating the images you want to map (Google Photos) and then importing this collection to be layered on a Google map (MyMaps).
Creating an album in Google Photos
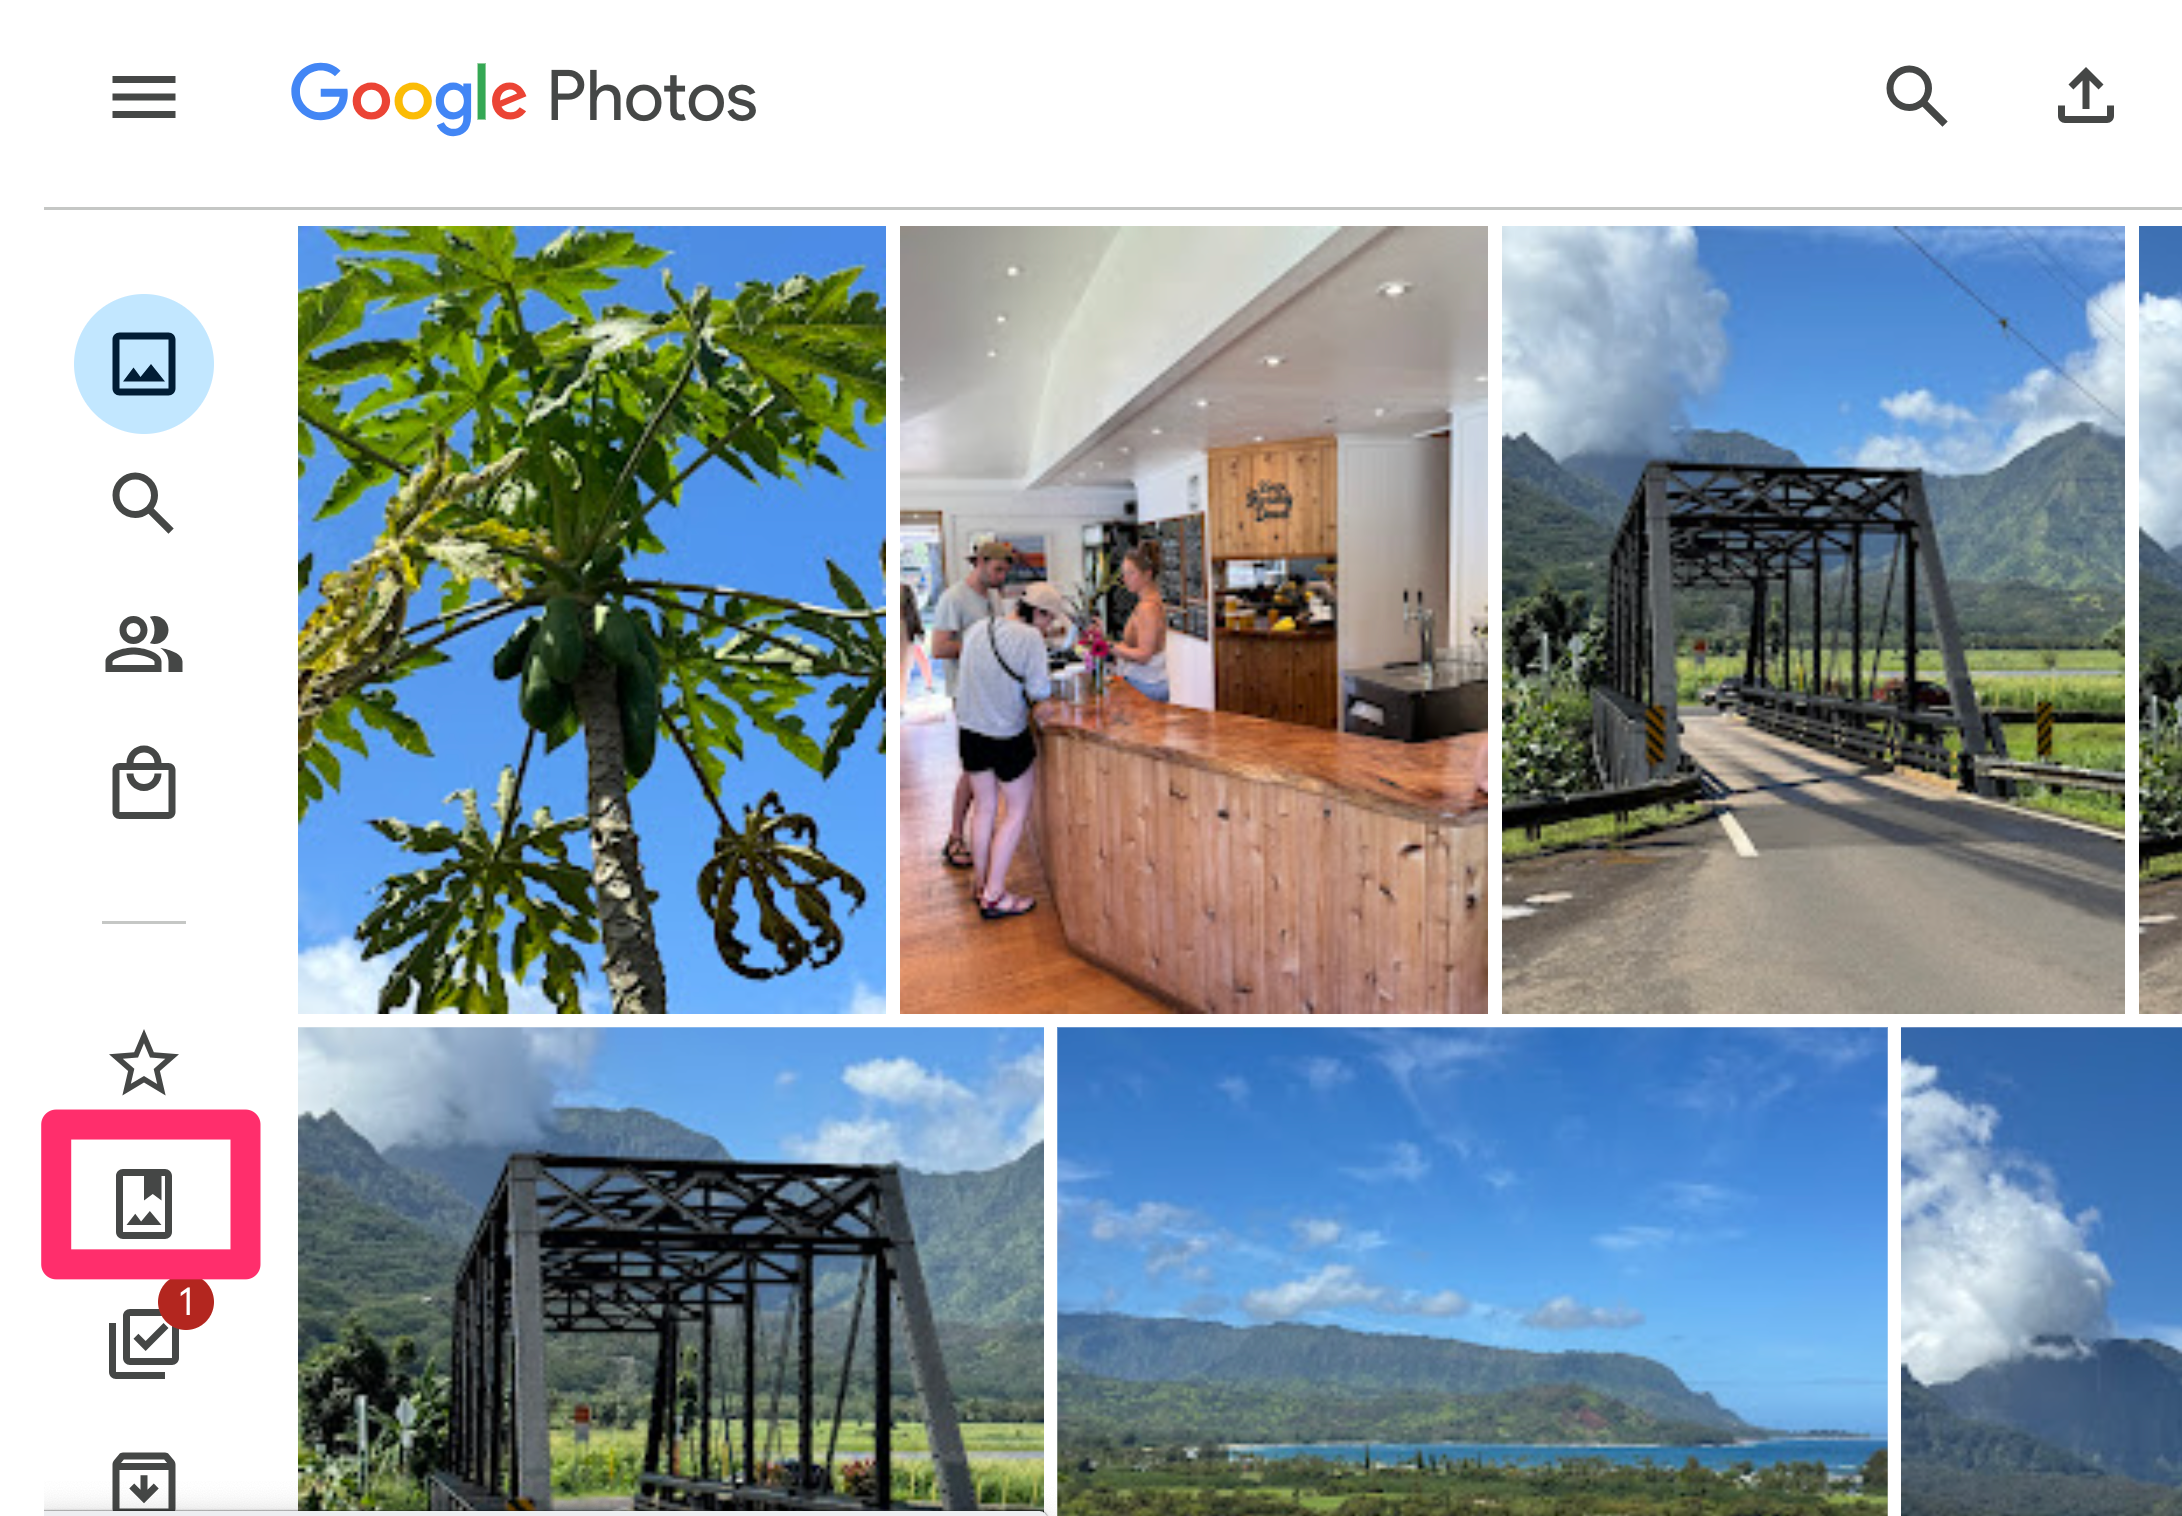
The first step involves the creation of an album to isolate a subset of photos. In the following image, you should find a column of icons on the left-hand border. The icon within the red box is used to create an album.
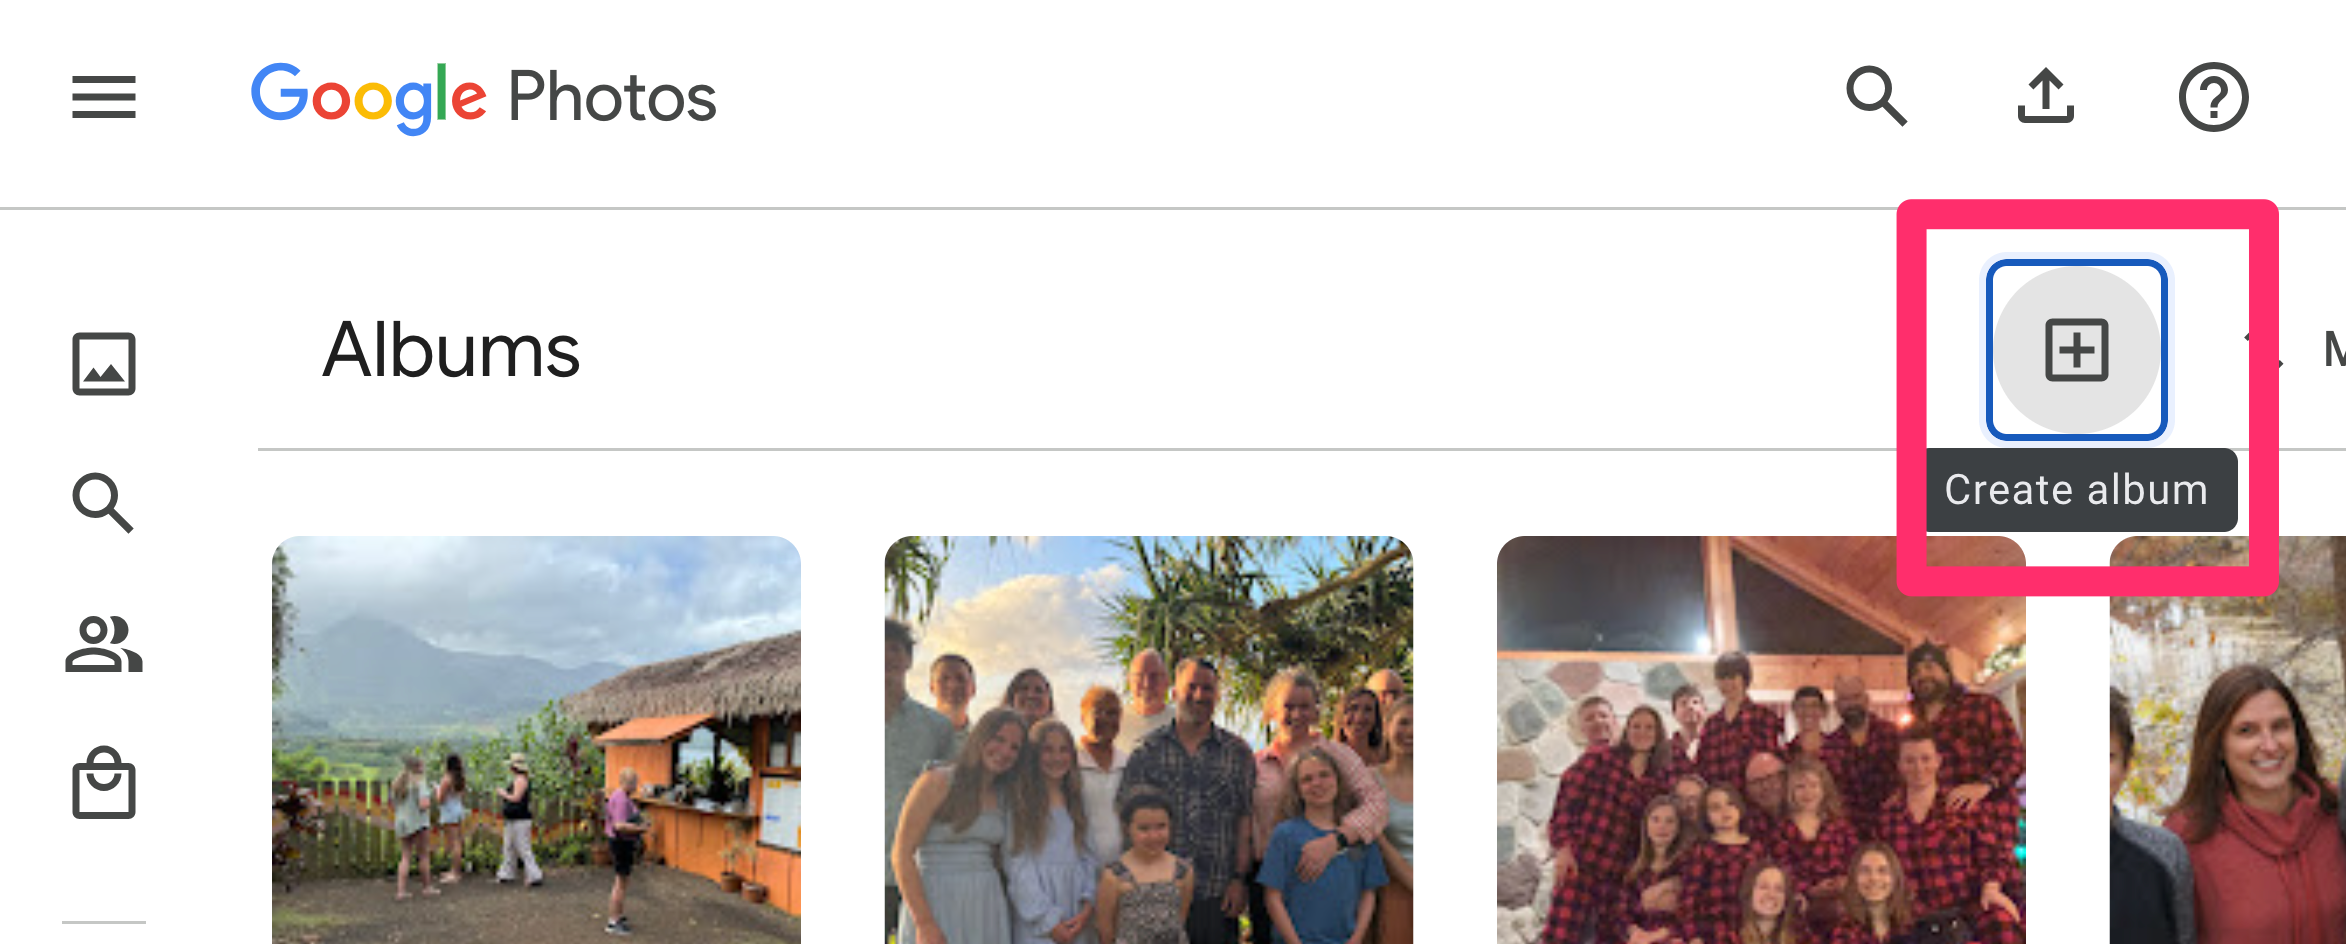
This icon should then display the Create album button at the top of the display.
Name the new album

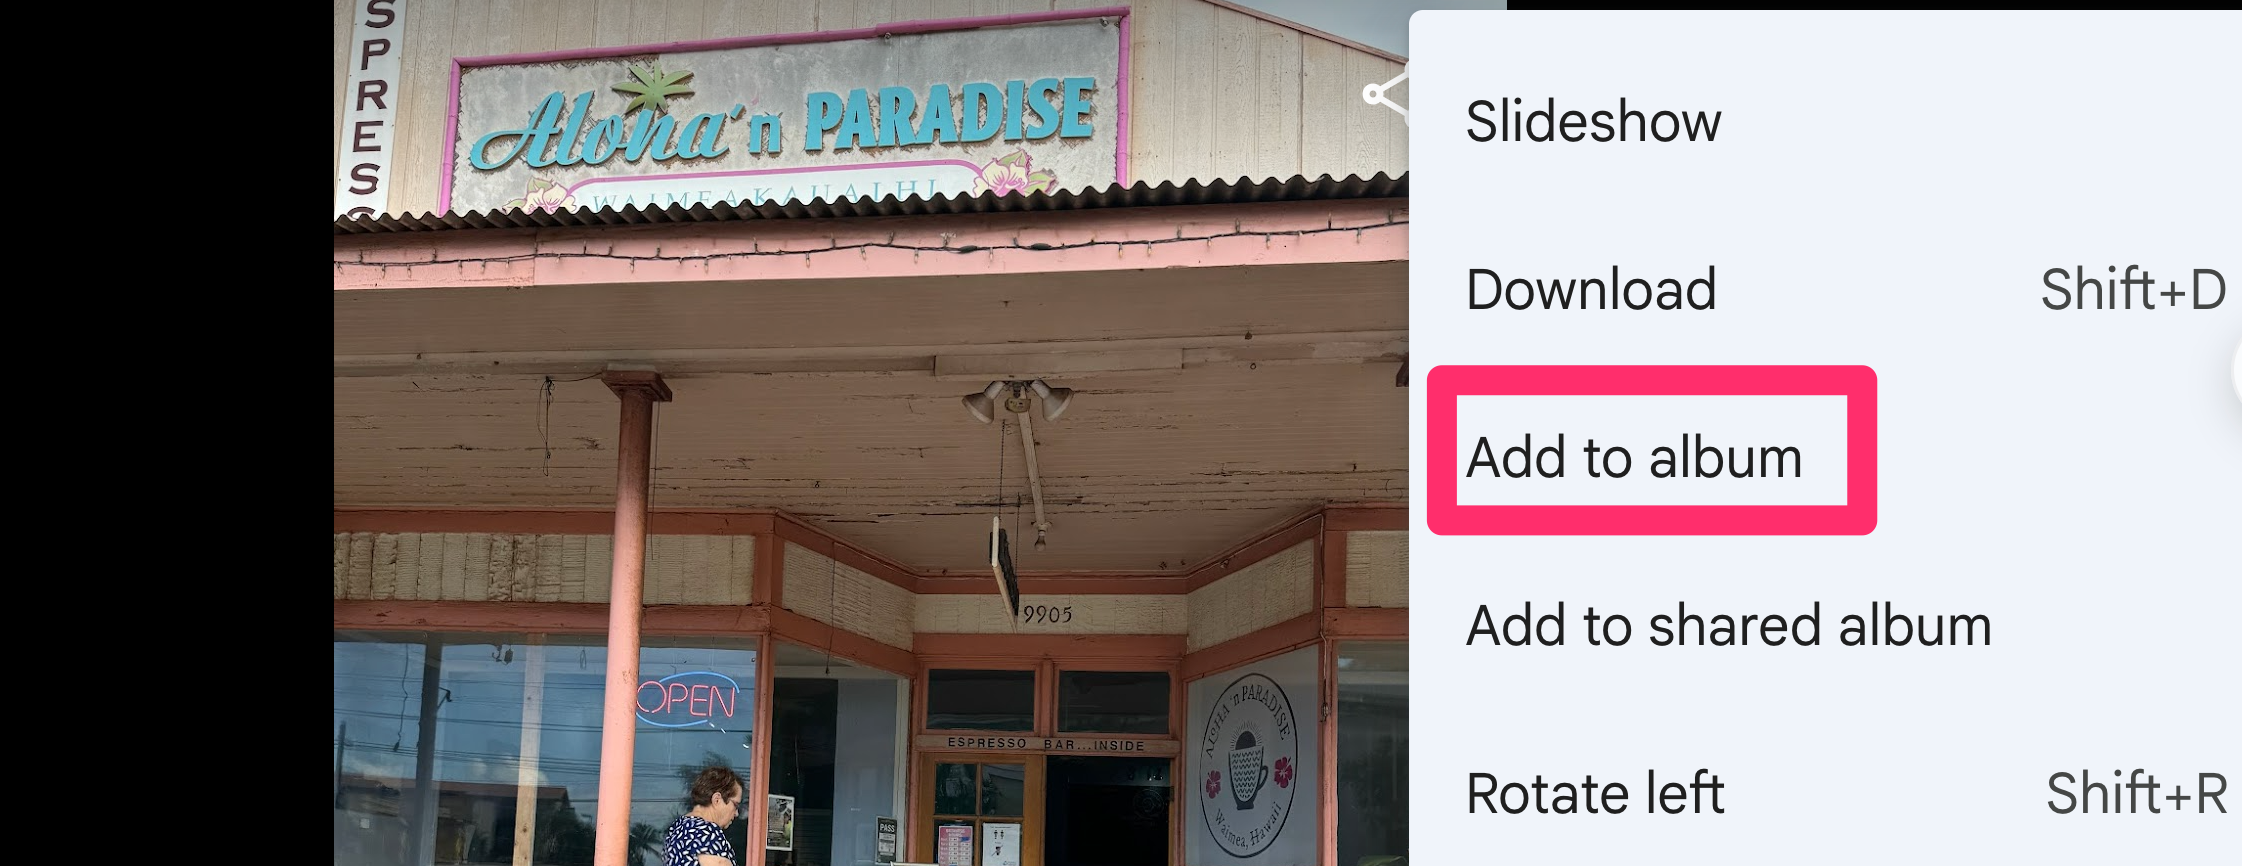
Now, return to photos and for each photo you want to map, use the drop down menu to add that photo to the appropriate album.
Continue until you have identified all of the images you want to map.
MyMaps
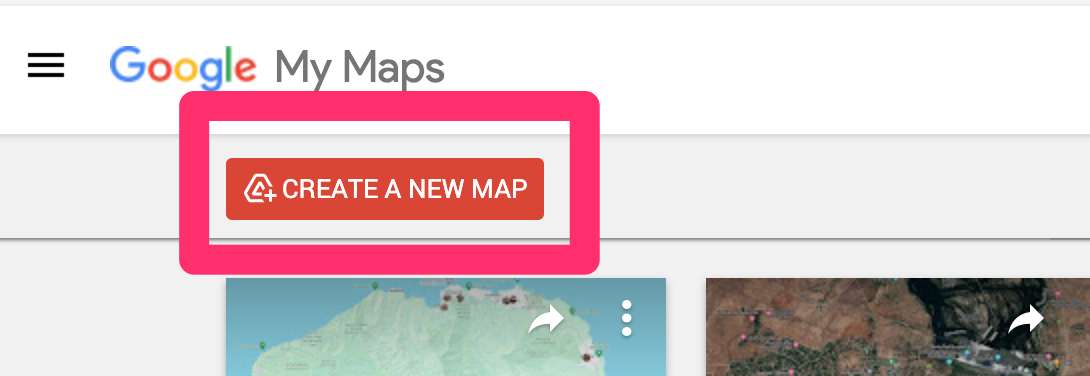
Google MyMaps (https://www.google.com/maps/d/) provides a means to create multiple personal maps by layering content (e.g., images) on top of the basic Google map. Using the link provided here, open your Google account and identify what you want to label your new personal map.
If you are adding images with GPS data, the process will automatically locate the images you provide to the appropriate location. It makes sense to me, to begin by moving the location that I am interested in to the screen. In this case, I am adding images to the island of Kauai.
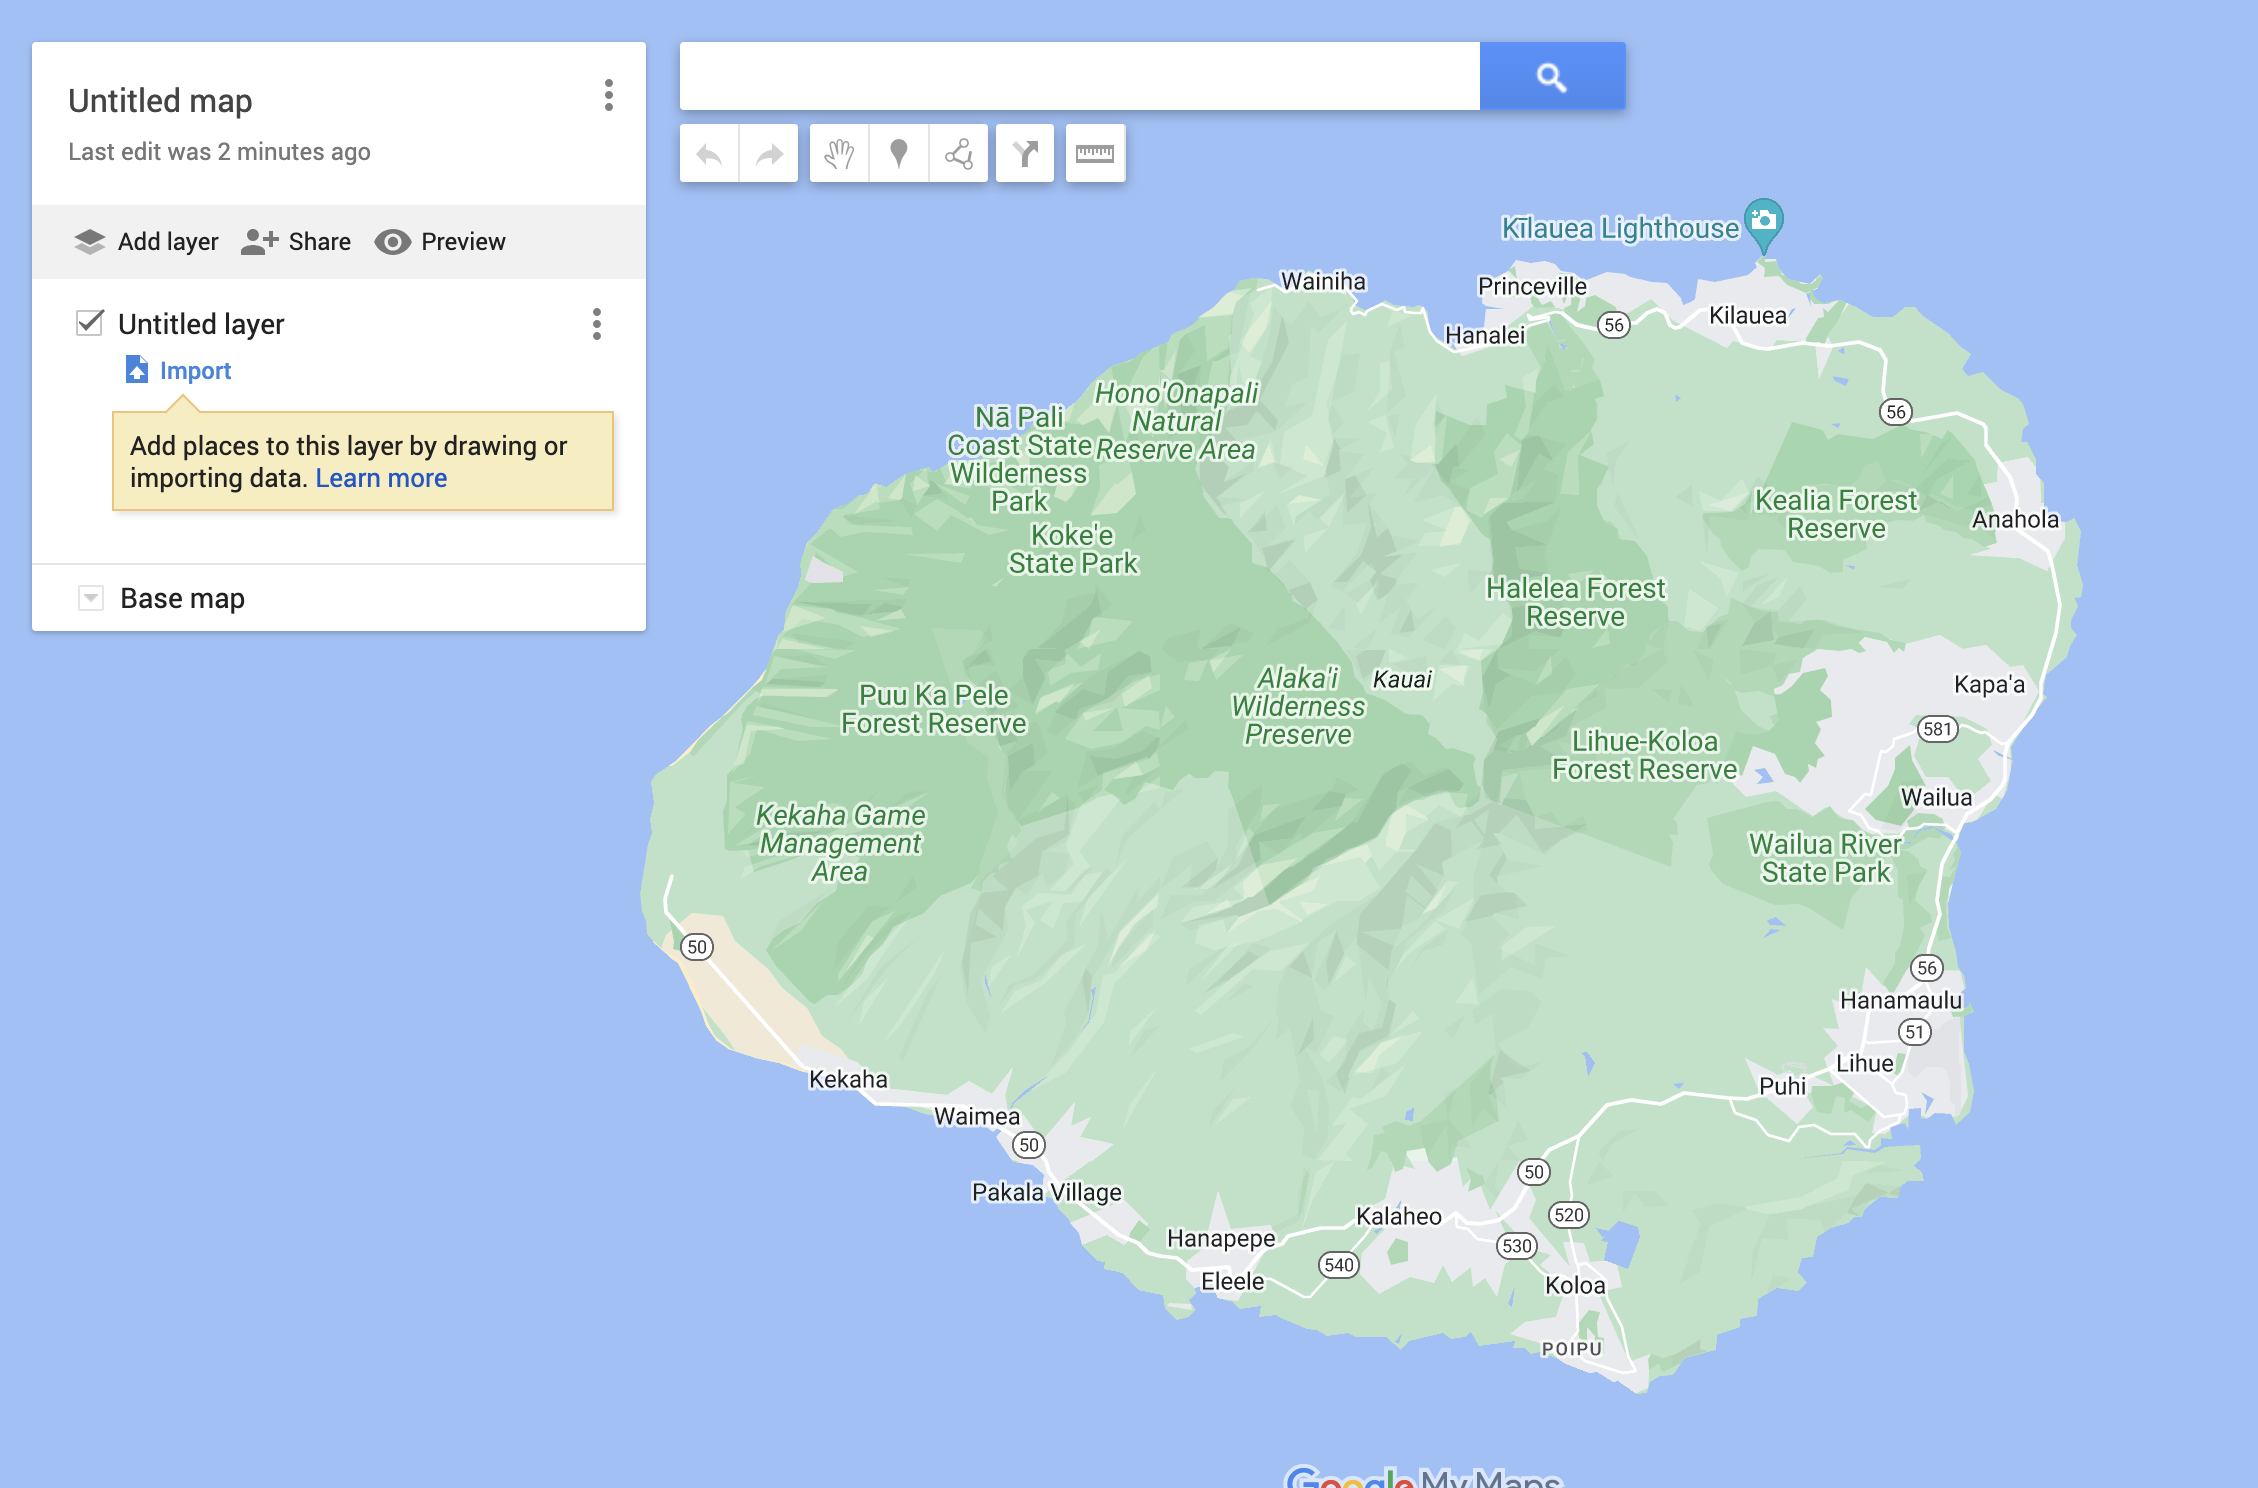
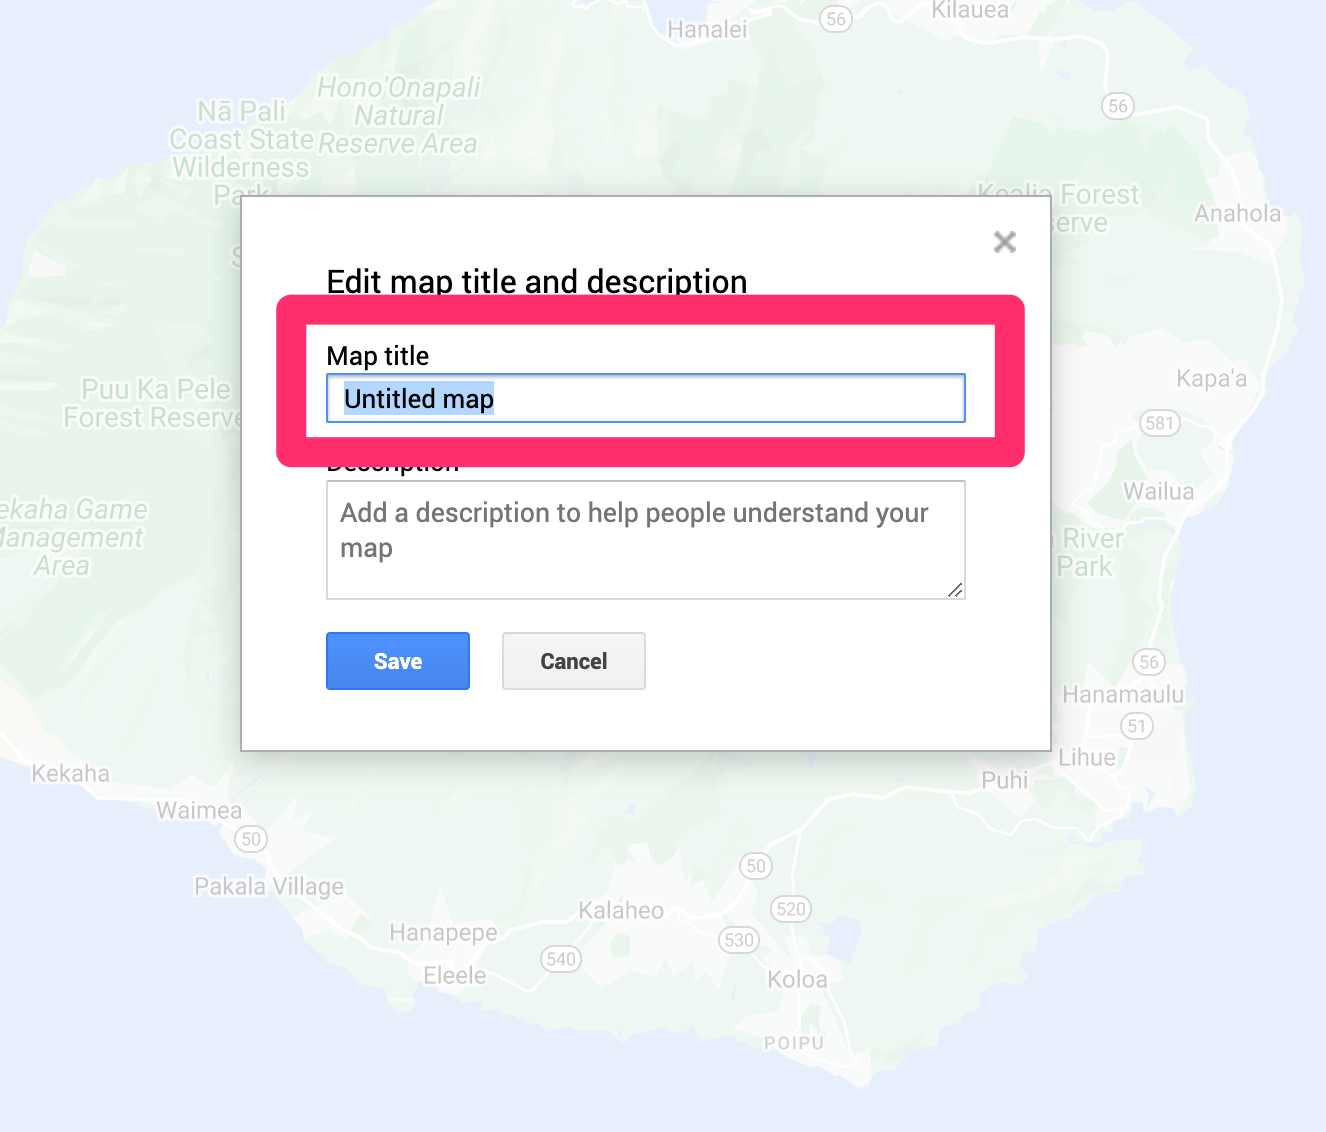
The following image is a panel you will see in several of the images that follow. The first use of this panel is to enter a name for the map I am creating.
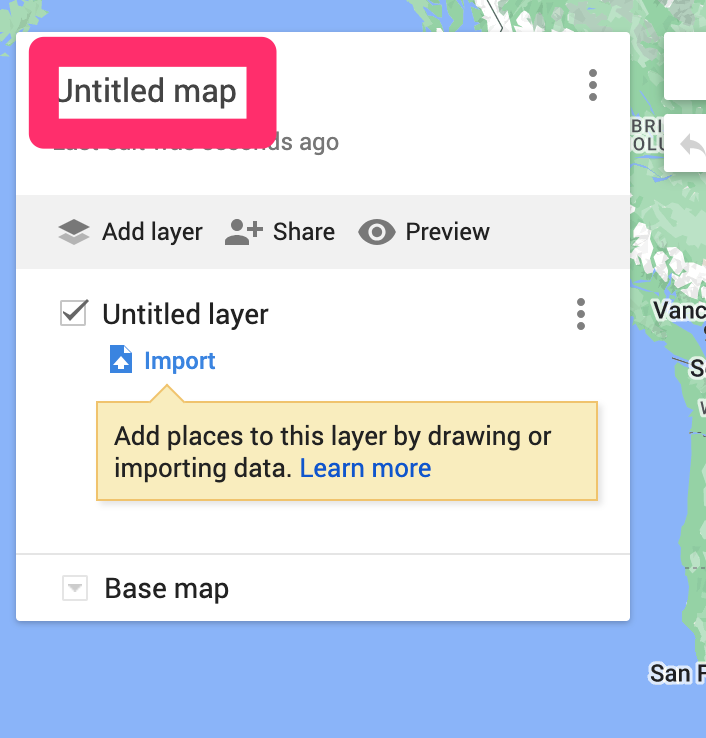
The text box to enter the name is revealed by selecting the original value (Untitled map) and this will open a box to add the name you intend.
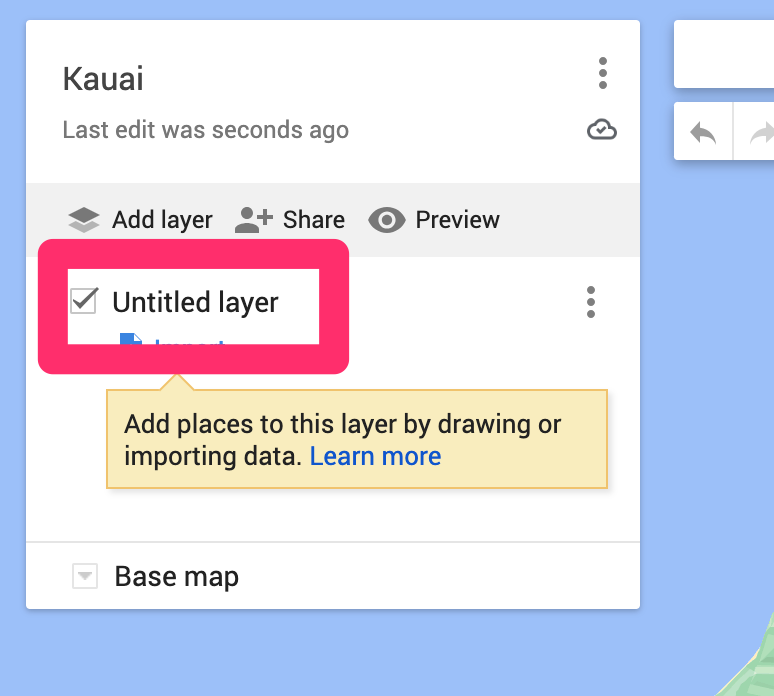
The next step is add the layer that will contain the photos on top of this map.
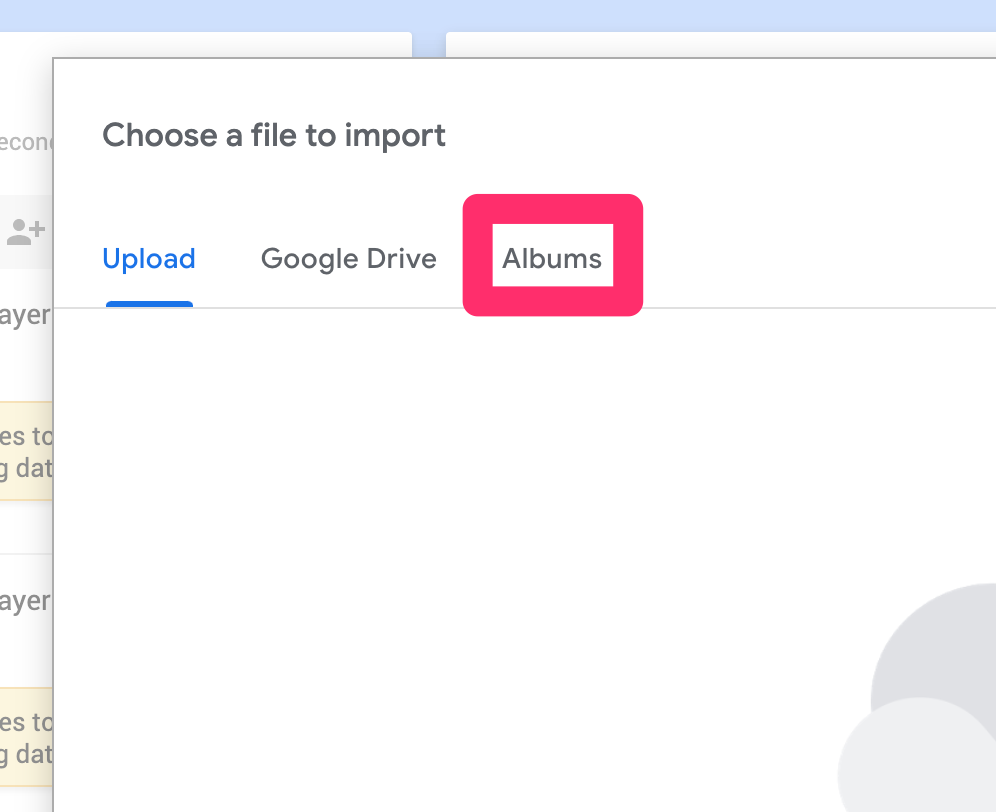
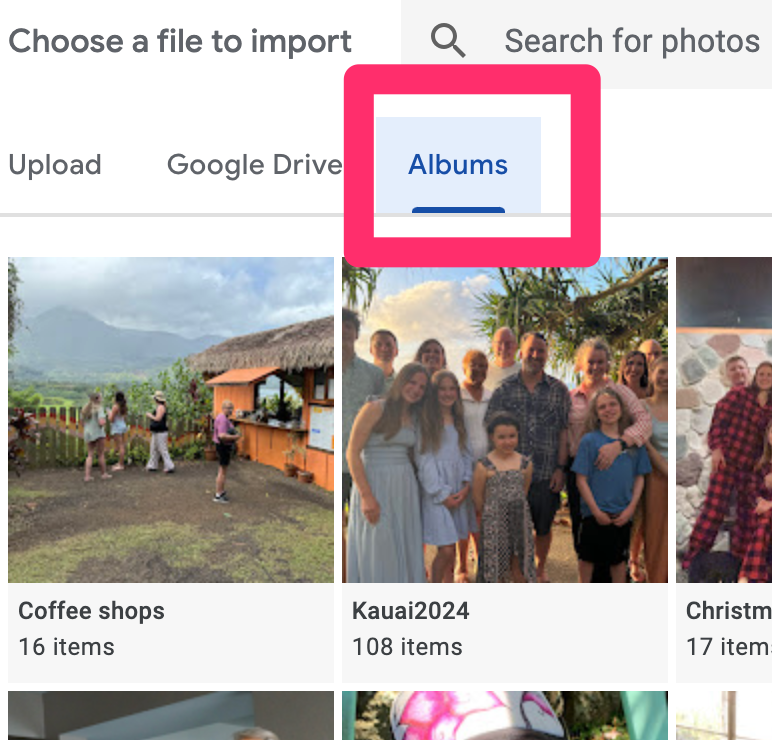
The approach I am taken is to add all of the images once and this is accomplished by referencing the Google Photos album that already exists. I select “coffee shops” from my albums.
MyMaps does not assume I intend to use all of the images in the designated album so I must now select the images I want to add to the map. When finished, select “Insert”.
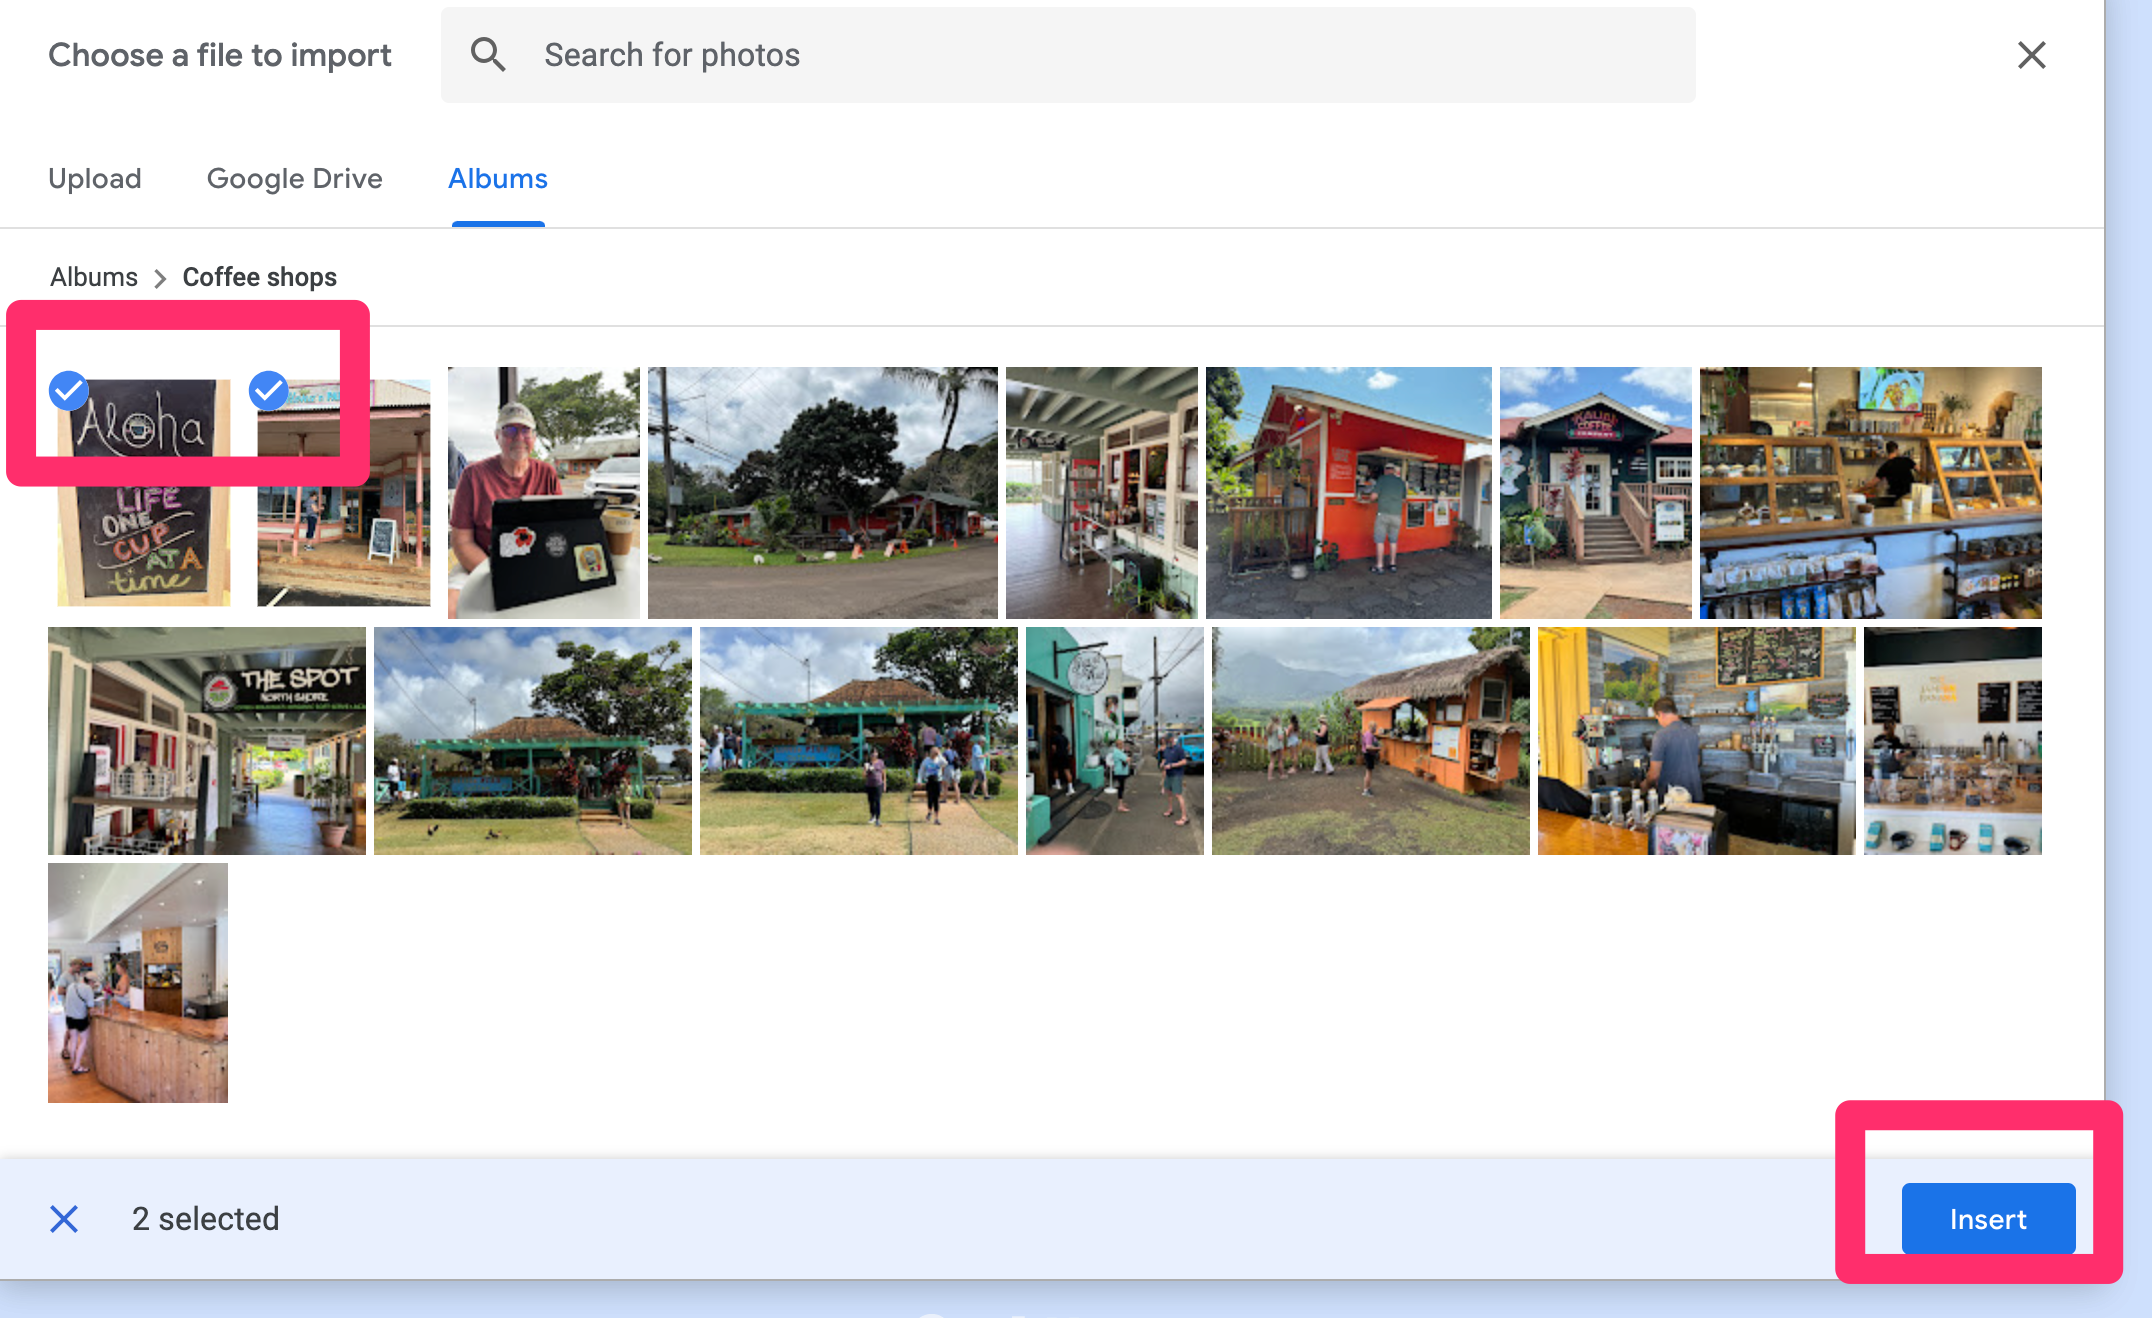
This generates the finished product.
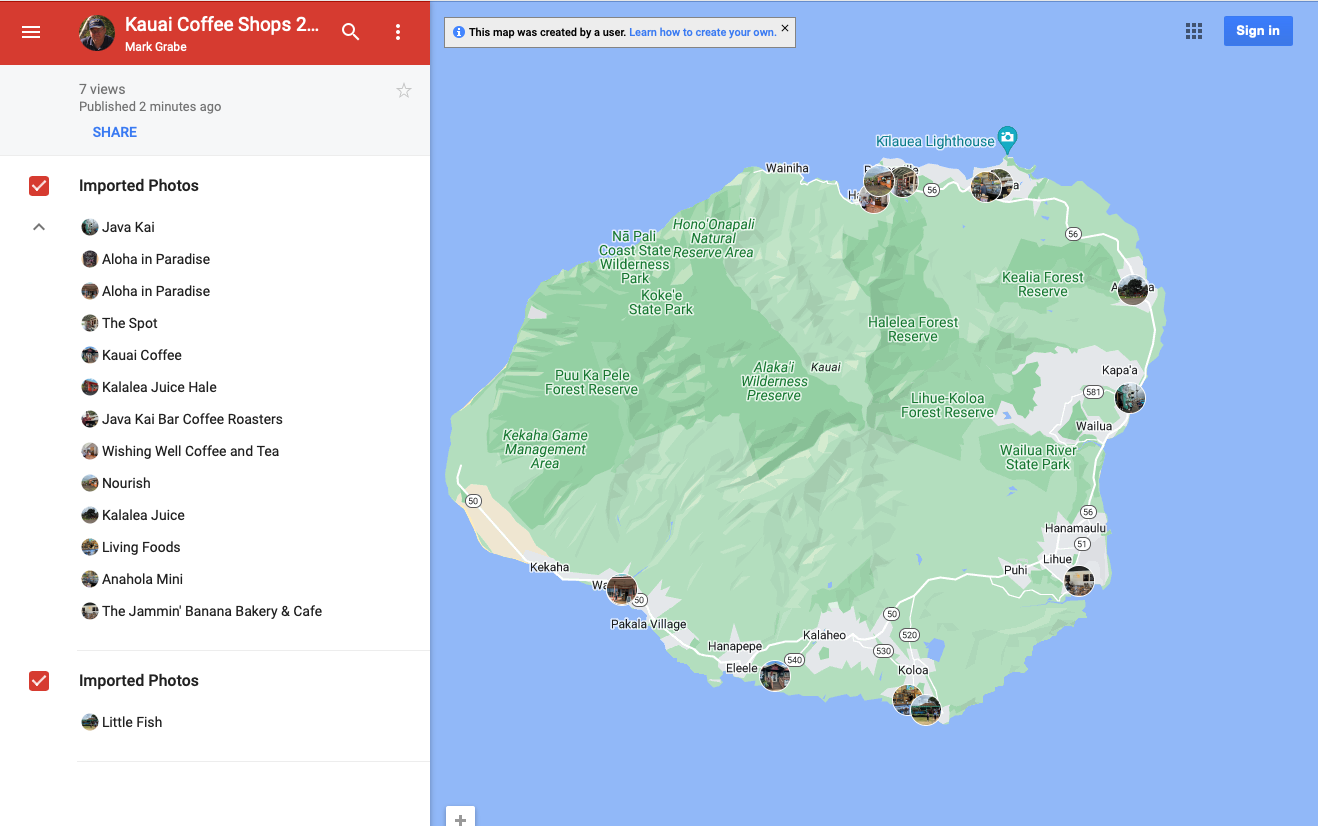
MyMaps allows you a way to share your map with others. Try this link to see the map I have just created. Selecting one of the thumbnails appearing on the map should open a larger view. Give it a try. Without the password, your access should be “read only”.
Summary
Google Photos and Google MyMaps allow students to explore GPS and GIS. Images taken with smartphones can be added to a Google map allowing authentic GIS projects. Care should be taken to understand how to turn GPS locations associated with photos on and off.
![]()


You must be logged in to post a comment.