Clip, Tag, Annotate

McIntosh (2019) describes the basic skills of personal information curation as Clip, Tag, Annotate and proposes that educators teach this sequence of skills first focused on a single information resource and then on multiple resources that would serve as material learning how to do something (e.g., pickle cucumbers) or create something (e.g., an original blog post). Secondary students might not do these things,  but these happened to be the last two curation tasks I completed so they were fresh in my mind as examples.  

Clipping

Clipping describes the process of finding something useful on the Internet and saving all or a portion of this content for later use. Tagging is the process of adding one or more useful labels to this saved content that should be useful in organizing multiple sources and locating these sources when needed. Annotation is the process of adding longer notes to the content created by someone else for the purpose of summarization or inclusion of personal insights related to the stored material. 

I have tried implementing this sequence of activities with OneNote, Google Keep, and Evernote which I think of as the main competitors in the low cost clipping and annotation services. My preference is Evernote. McIntosh wrote his article for educators based on his classroom use of Microsoft OneNote. To be fair, I pay for a fairly expensive version of Evernote, but there is a free version that should allow users to apply the techniques I describe here. 

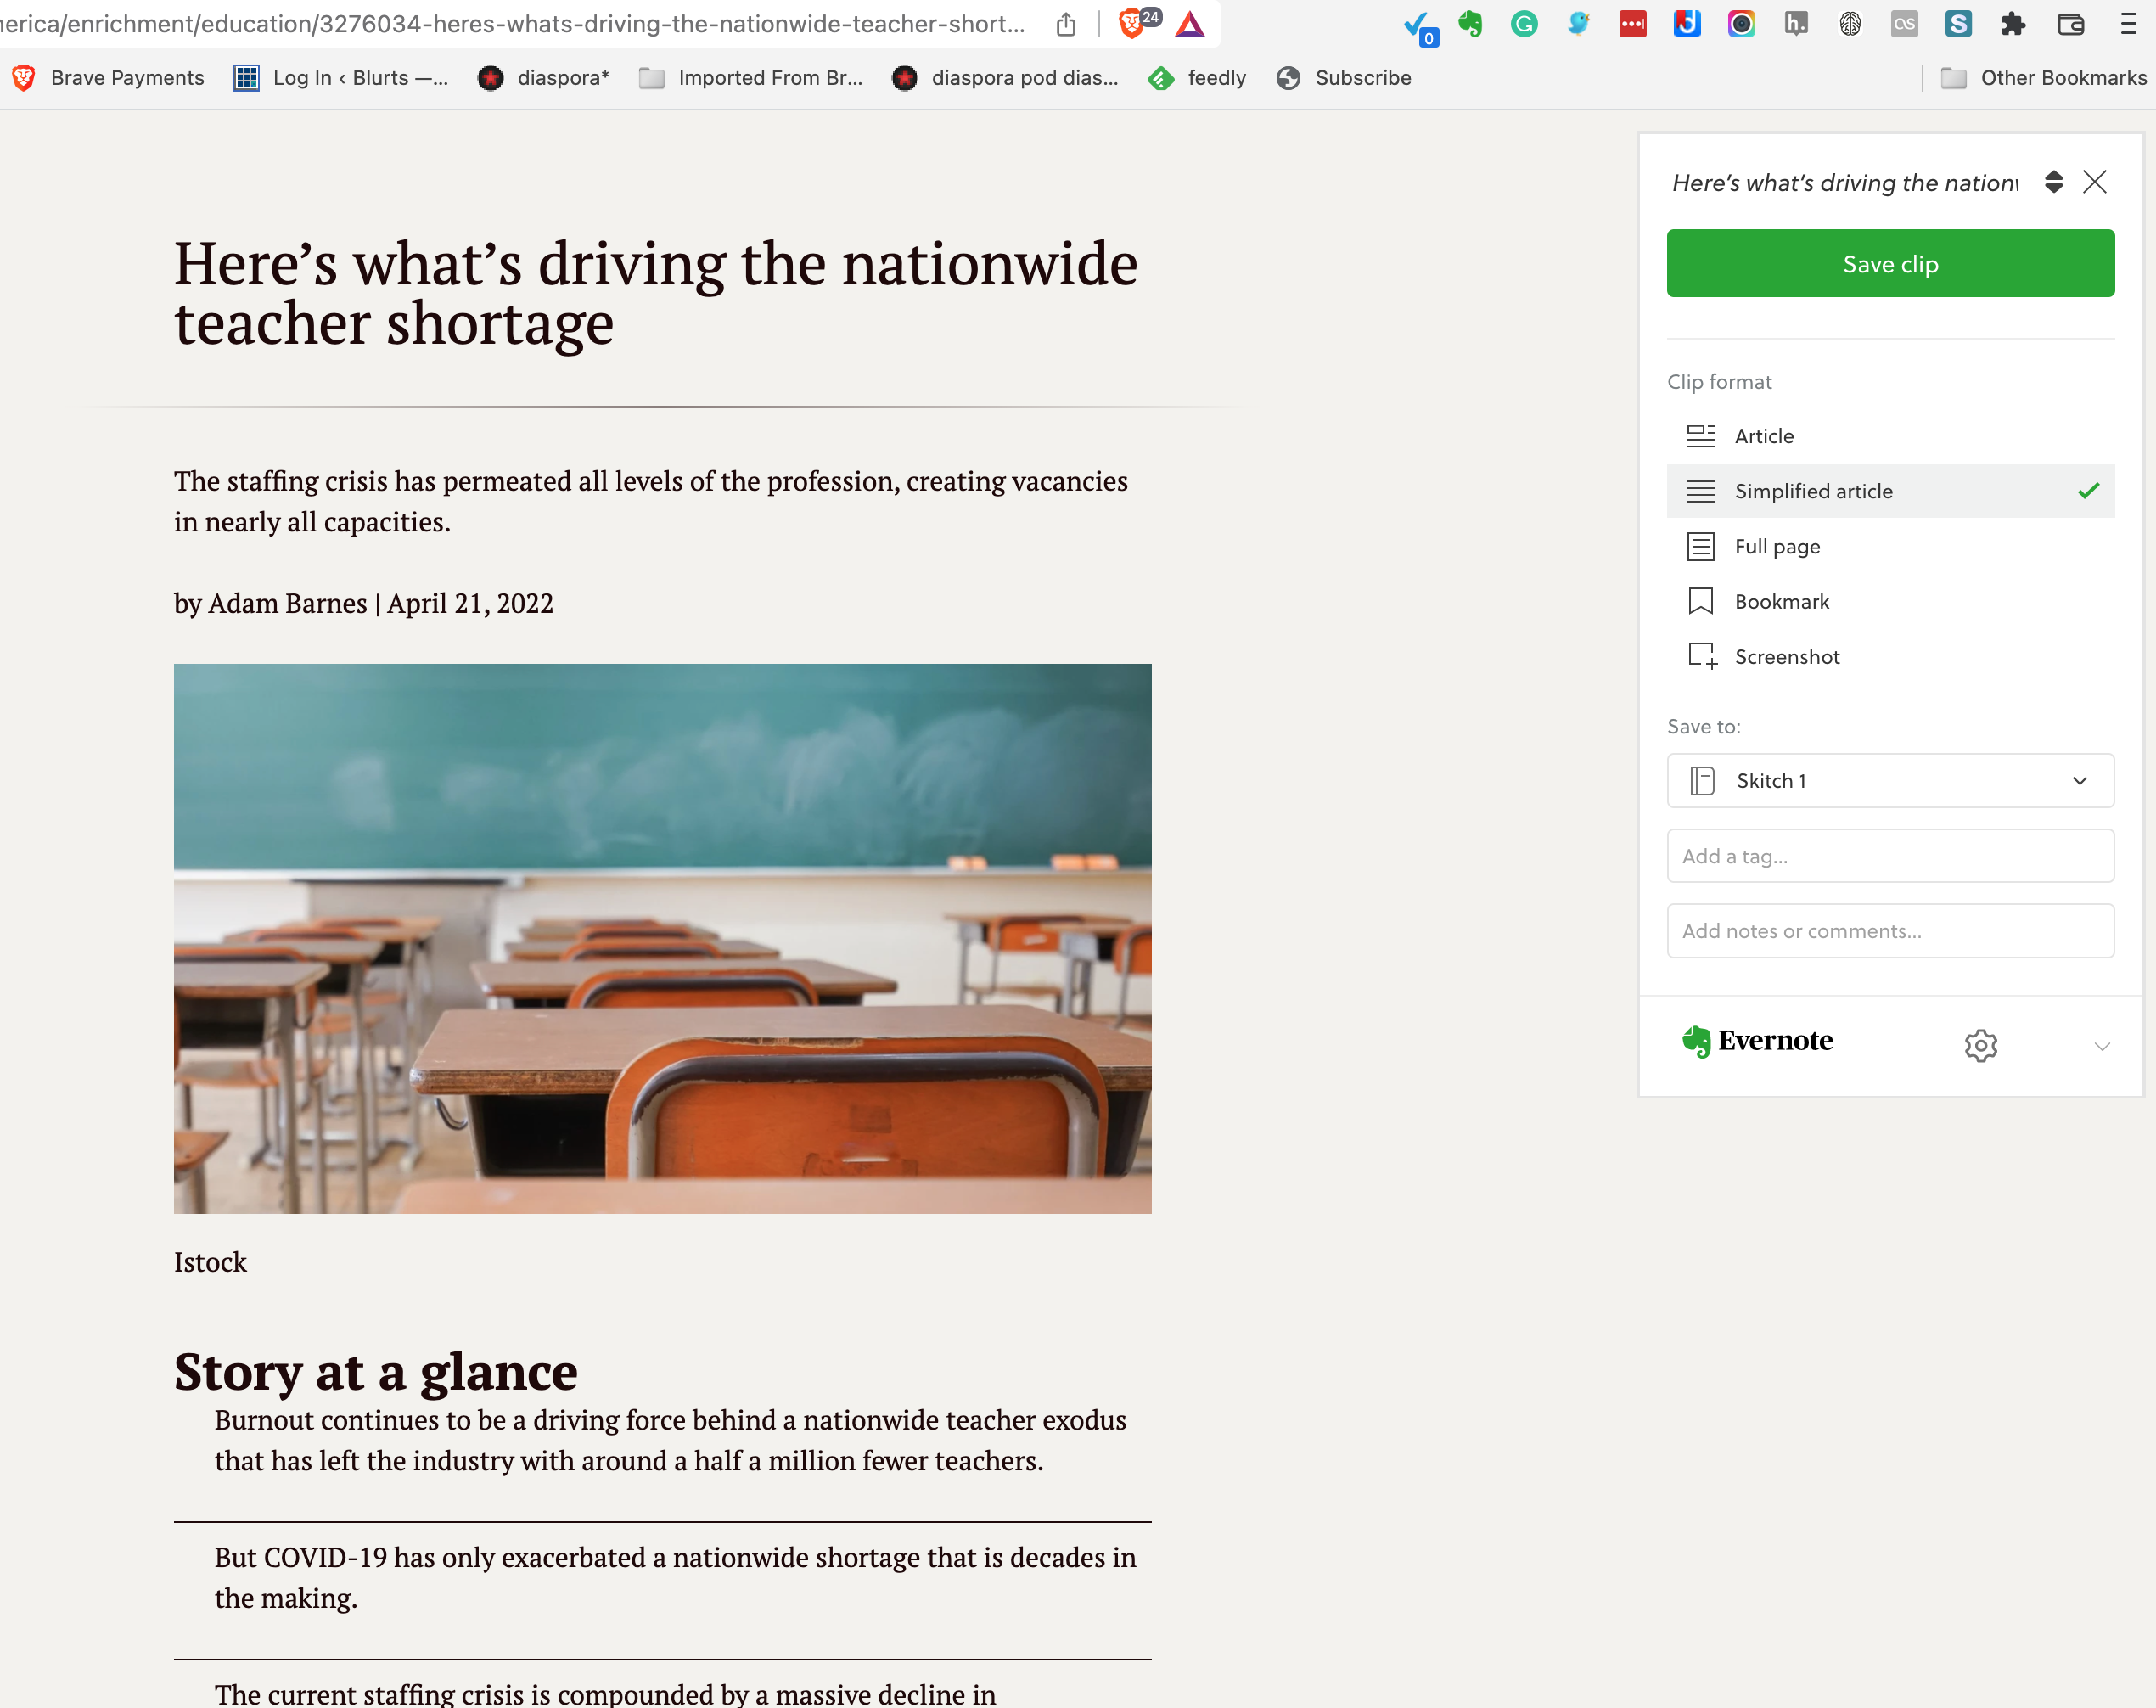
Clipping is accomplished using an extension added to your favorite browser. I use Chrome, but the Evernote extension can be added to other browsers. While the process works a little differently, content can be added to Evernote from a phone, tablet, or computer. You have the greatest control when using a computer with the main advantage being the opportunity to store parts of a web source rather than the entire document. 

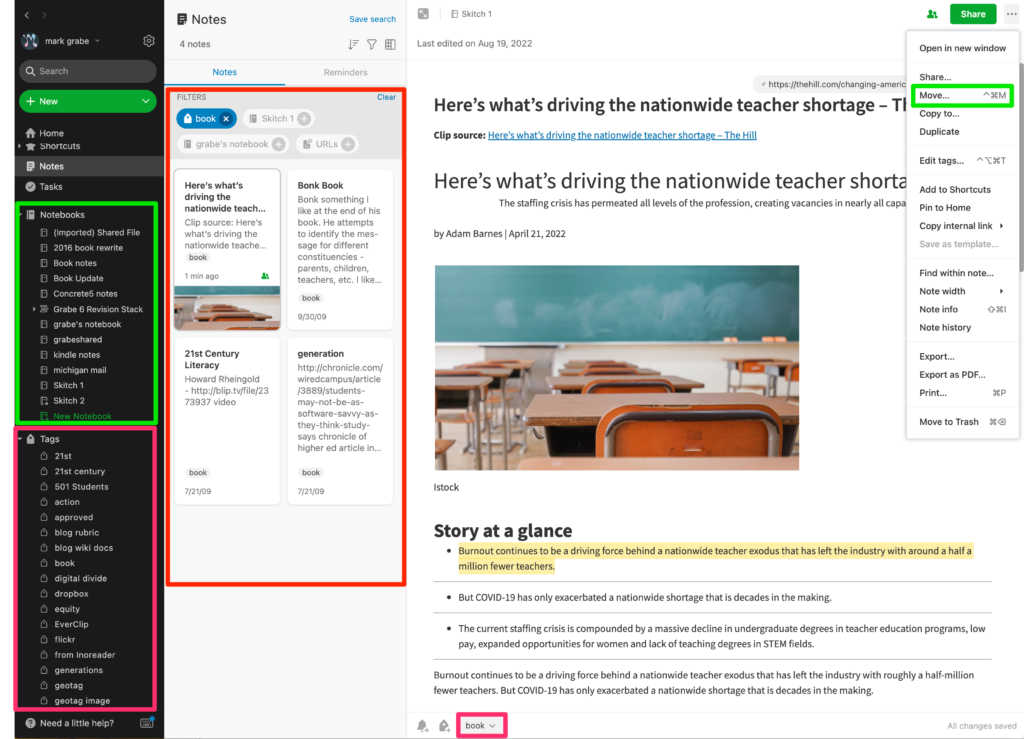
Understanding how Evernote works requires some additional comments. The following is the display as it appears on a computer. I will refer to this image at several points in this description. I think describing this as four columns works best. Actually, the software is flexible and offers the opportunity for different arrangements depending on personal taste. 

I will describe the columns from left to right. The first column offers the most general controls. I will concentrate on the note-taking capabilities and ignore other tools (e.g., tasks). Focusing on notes, the basic structure is that of notebooks as repositories of clipped content suited to a given purpose, notes, and additions to notes such as highlights, annotations, and tags. The areas contained in green squares involve notebooks. In the first column, you have the notebooks I have created. In the far right green box, you have an item from the drop down three dots (…) that allows the active clipped content (the third column) to be moved to a specific notebook. The red box in the first column identifies the existing tags. You create your own tags. These tags are listed in this box. The tagging of content will be described in the next section. The second column contains thumbnails representing stored content. Click on a thumbprint and the full document appears in the third column. Selecting a tag reveals the thumbprints for all content associated with this tag displayed within this column. So tags serve a filtering function for search.

Tags

A tag is a word or phrase used to classify content. Words such as topics or descriptors have similar meanings. In a system like Evernote, a user creates tags to categorize content as an organizational system that can make future retrieval easier. Hence, it is important when assigning tags to consider both descriptive accuracy and likely future application. Evernote offers a way to nest hashtags allowing a hierarchical classification system – e.g., computers – Apple, Windows, Chrome. In the image above, you see what happens when you select a hashtag. All existing content assigned that tag will be identified. Tags become a powerful organizational tool that becomes more valuable as the amount of stored content grows and as time passes making retrieval efforts more productive.

The creation and assignment of tags are distinct processes in Evernote. If a tag comes to mind perhaps in response to a newly clipped item, it must first be added to the collection of tags and then attached to that content item. When you first clip content, you will be asked to assign that clip to a notebook and to add desired tags. This is easy to see in the second image. New notebooks and tags can be declared at this time. Or, at a later point in time, clipped content can be moved to the desired notebook and new or additional tags can be added. With the desktop version of Evernote, this is a simple matter of dragging a tag or tags from the display of tags to the active document. 

Annotation

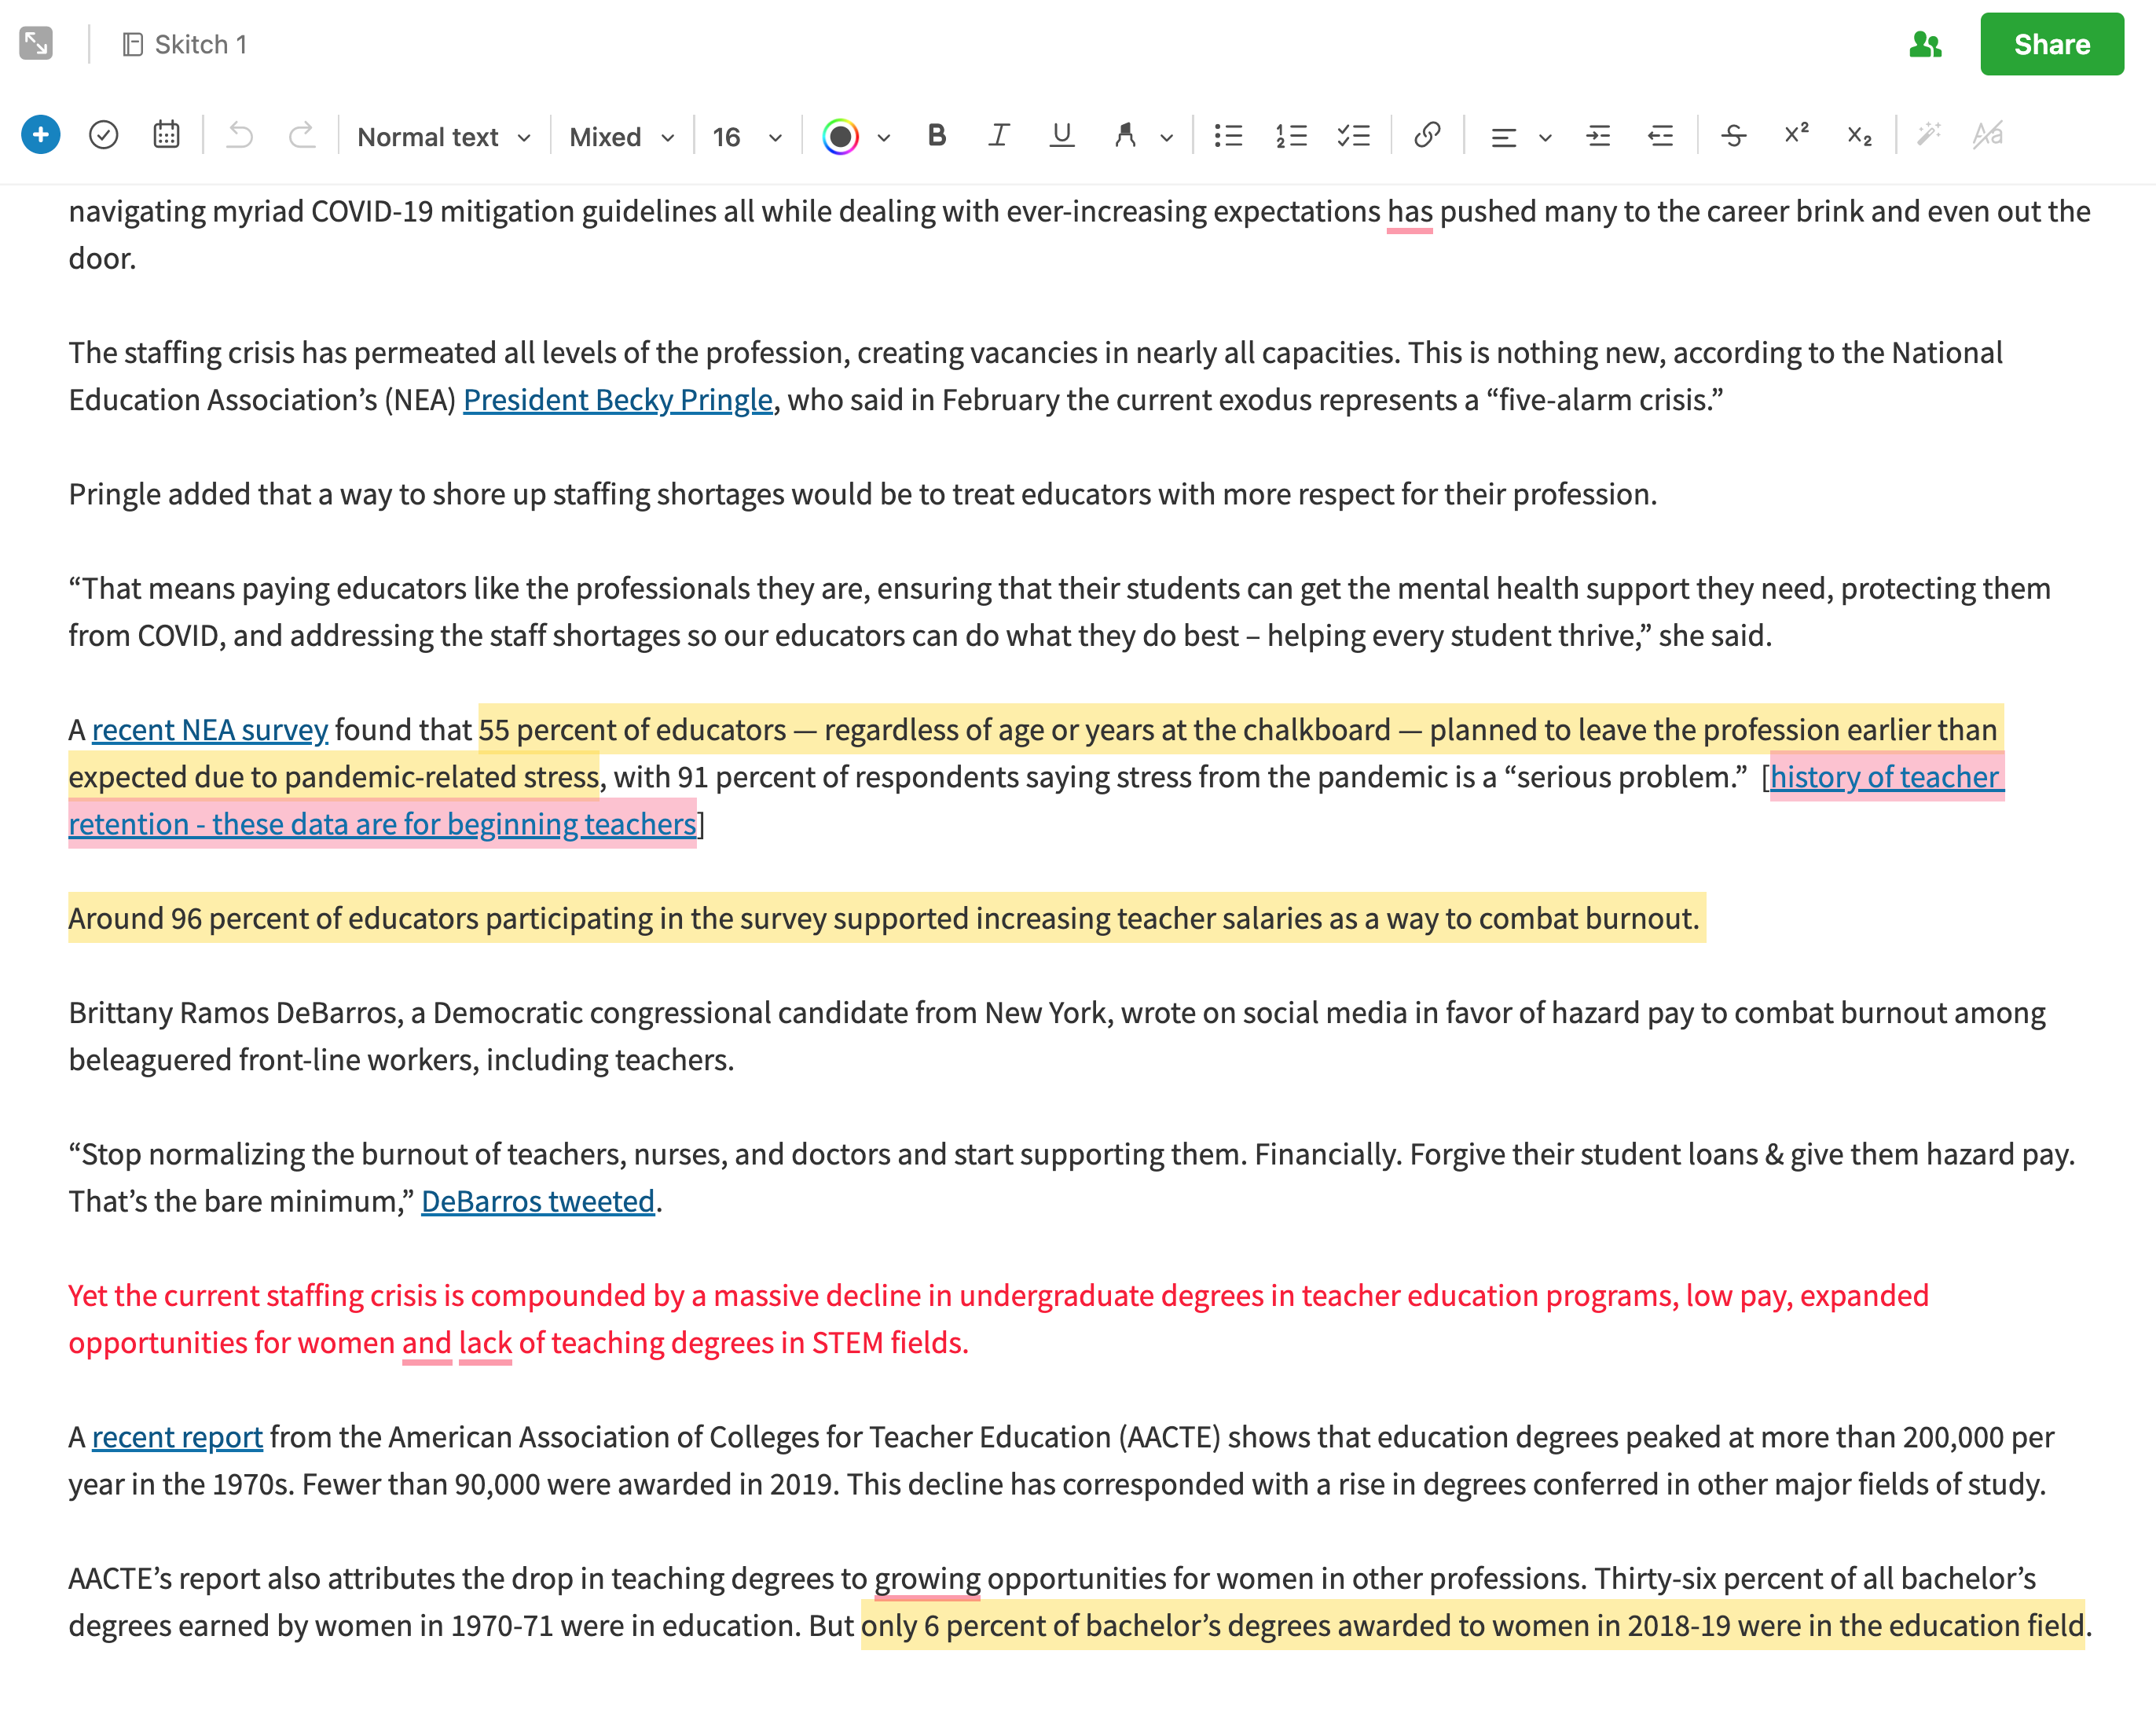
Annotation is used here to mean making additions to the stored material. Highlighting would be one example. With Evernote you add personal notations as part of the stored document. Think of this as being given a word processing document written by someone to which you can not insert text, links, or images. To make this what I consider a useful practice, I want to differentiate my additions from the original content so I change the text color to differentiate my summaries, comments, and questions. (See example in previous post)

Summary

McIntosh proposed clipping, tagging, and annotating as active reading practices students should learn to apply to digital texts. These are skills most students have not practiced and may not be allowed to apply to paper-based content. McIntosh proposed that students start with individual online content learning to add this content to a storage system, tagging the stored content, and then adding annotations that might be based on personal insights or based on a purpose assigned by the teacher. Using a common assigned online resource, the teacher can then comment on the choices made by individual students and perhaps then share student work to allow students to see how others have reacted to the same content. Once the basic skills are mastered, McIntosh proposes the system be applied to a research project requiring students to locate sources relevant to a goal, create a notebook, tag resources, embed annotations relevant to an integrative task, and finally generate this integrative project. Students should find this collection of skills relevant to many tasks they will be expected to complete for academic purposes and hopefully generalize the skills to the accumulation of resources they can apply more generally. 

McIntosh, J. (2019). Clip, Tag, Annotate: Active Reading Practices for Digital Texts. In Digital Reading and Writing in Composition Studies (pp. 176-188). Routledge.

Loading

Key ideas and lateral reading

I promised I would offer some examples of ways to teach annotation and note-taking. Here is an example of an experience that Cohen called “sideways” reading. Within the literature focused on dealing with online misinformation, I have heard it more commonly called lateral reading. I propose an activity that focuses on two skills: identification of key ideas and cross-resource investigation of these ideas. These two skills are implemented through highlighting, online search, annotation, and linking. The learning experience requires that students are assigned a reading and are then asked to highlight the key ideas from this resource and then engage in online search to extend their understanding of these ideas. If the focus is on resource evaluation, the online search would focus on determining if key claims are verified in other resources focused on the same issue.

The tool I recommend for this activity is the free version of Evernote. Evernote is a versatile tool that allows the clipping of online content, the annotation of saved content, and the sharing of any annotated material. I am using Evernote in this example as a browser extension.

Web content is “clipped” to Evernote by activating Evernote from the iconbar while viewing the desired web page in the browser. For this activity, I find the “simplified” version option most useful. The intent is to concentrate on the text and this option eliminates other parts of the browser display that are not part of the core article.

When you open the clipped content in Evernote, you have access to tools for acting on the original material. I have used the highlighter to highlight in three colors – red for what I decided was the key idea from the document, yellow for other important information, and pink to identify links I have added based on my lateral reading. Evernote allows me to add text which I have enclosed in brackets and then I have linked this text to the articles I found in my search for information I thought might improve my understanding of the content. For this example, I selected an article on the teacher shortage because I thought educators might find this to be an interesting topic.

Finally, the share button (see image above) allows me to send the composite of the original and my annotations to others. I would have students submit their work in an email, but I am sharing the link below so you can see what a composite document would look like.

https://www.evernote.com/shard/s2/sh/9b1da985-8e52-459b-acf3-572da920608b/179f6e93d405755d0f8365ae4fec1e7d

Cohn, J. (2021). Skim, dive, surface: Teaching digital reading. West Virginia University Press.

Loading

Tools for thought

One could easily get the idea that recent proposals for “a second brain” or “smart notetaking” and related implementation tools such as Obsidian or Roam represent radical innovations for using technology to extend human cognition. This is not the case and after thinking about the recent interest in such concepts and tools I am left wondering why there has been such a lull in the development and implementation of such ideas.

I trace my own interest in similar ideas to reading Vannevar Bush’s Atlantic article As we may think and his proposal for a device for augmenting cognition he called a memex (if you search for memex you may find that others are not trying to implement some of his ideas). Steve Jobs proposed that the personal computer could serve as a “bicycle for the mind” noting that when using the technology of a bicycle a human could drastically increase their speed of movement.

I good source for some of these early ideas can be found in Howard Rheingold’s Tools for Thought (1985). Rheingold sat for a recent interview talking about Tools for thought and even noting links to more recent tools for augmented cognition. If you unfamiliar with this history and interested in the topic, I encourage your attention to Rheingold’s comments.

Loading

Annotating Newsela articles to develop deep reading skills

Many of my recent posts have focused on note-taking and annotation. These activities have long been a personal interest. New opportunities to use these strategies in a digital environment have rekindled my interest and I have been trying to find ways I can share recommendations that bring these skills into middle school and secondary school settings.

One important observation I have found in several of the sources I have read is that learners are seldom taught to take notes or annotate. There are now many researchers and educators writing about taking better notes for the implementation of a PKM (personal knowledge management) system or a second brain. The emphasis here is a little different than the emphasis that might apply in classrooms. With PKM, you are creating notes for your use that fit your personal goals. Perhaps you want to build up resources you can use in writing blog posts or perhaps you want to store specific methods for solving a coding challenge. With classroom applications of annotation, you are usually trying to process and store important ideas provided by someone else. Perhaps you are preparing for an examination or to complete some other assignment that will follow a reading task. Students may take notes from presentations, but often take few notes or add few annotations when reading. Whether experiences exist or not, the opportunities to learn to apply such learning strategies are few. 

I have located several sources that propose how annotation and note-taking skills can be taught to younger learners. These primarily are focused on adding highlights and margin notes to content on paper and typically these approaches suggest that educators make copies of content from sources that students can mark up without concern for damaging resources not intended for annotation. I provide several of these sources at the conclusion of this post and encourage interested educators to take the time to read one or more of these sources. The sources provide step-by-step approaches to teach the skills of note taking and annotation. 

My interest here is in proposing a digital source and opportunity for annotating and highlighting that is readily available and efficient to use. You don’t have the problem of marking up what are intended to be reusable commercial materials with digital content. Most teachers are probably familiar with Newsela. This service provides reading material for most content areas (e.g., science, current events) with the unique opportunity to assign a variation of a given article at different reading levels. This allows a teacher to individualize a reading task within a class and have all students read about the same topic. The content comes with comprehension questions and other learning activities.

The capability of the Newsela environment that I am promoting here allows the teacher and individual students to annotate (highlight, take notes). I have written about this capability some time ago and I remembered this capability when I was trying to think of something I could suggest for educators interested in teaching annotation skills in a digital environment. Newsela provides its own explanation of how to annotate text. 

The annotation process in Newsela is very simple and I think that is what you want. When you drag content, you are provided an opportunity to select different colors for highlighting. When you highlight something, you are provided the opportunity to add a note to what has been selected.

Newsela also provides a way to share annotated content. Sharing is available for both educator to students and student to educator. The opportunity to assign an annotation task (e.g., highlight the main ideas in this article) and then submit the completed task for review works through sharing.

Highlighting and note-taking in Newsela are easy to figure out. I encourage educators to take a look and imagine how this capability might be applied. I provide several sources for instructional strategies below and I will try to summarize some of these ideas in a future post.

Sources:

Cohn, J. (2021). Skim, dive, surface: Teaching digital reading. West Virginia University Press.

Lloyd, Z. T., Kim, D., Cox, J. T., Doepker, G. M., & Downey, S. E. (2022). Using the annotating strategy to improve students’ academic achievement in social studies. Journal of Research in Innovative Teaching & Learning. (early version)

Zywica, J., & Gomez, K. (2008). Annotating to support learning in the content areas: Teaching and learning science. Journal of Adolescent & Adult Literacy52(2), 155-165.

Loading

Designing Instruction Using Layering Services

I have been debating whether or not to update my Kindle book “Designing Instruction Using Layering Services”. Unlike my other book which was first published by a traditional textbook company for courses in educational technology, Designing Instruction was focused more narrowly and explores the combination of two more unique topics – teachers as designers and what I decided to call layering. These topics probably seem more niche to most educators and not the type of thing likely to be emphasized in at least undergrad courses in educational technology. I get that. However, I think the topics are becoming more mainstream and would be beneficial should I find a way to explain how they provide a way to think about and engage in other emerging class activities most educators recognize. 

Teacher as designer. I use the phrase “teacher as designer” as a contrast to educators who focus on implementing commercial instructional materials. In my writing, I draw a distinction between information resources and instructional materials. We all take in information resources all of the time and we do learn from such experiences. We read and watch informative news and information sources; television, newspapers and magazines, and YouTube videos. The difference between exposure to such resources and exposure to instructional materials is the addition and more probably more relevant for my purposes the embedding of elements intended to encourage and assist the reader/viewer in the processes which increase the understanding, retention, and application of the information presented.

As educators, we might interact directly with students to develop interest in a new topic, discuss the material, and encourage learner reflection on their own related experiences. Similar goals can be addressed by educators and instructional designers by adding experiences to instructional resources created by others. Questions can be asked face to face, offered through a workbook or worksheet, or embedded before, during, and at the conclusion of digital content. The identification of essential material within a source document can be identified with highlighting and additional content can be added to supplement the work of another author as a “boxed” insert. Discussion topics can be recommended. My point is that a designer or potentially, a teacher functioning as a designer, shapes the activation of relevant existing knowledge and past experiences, motivates, directs processing, and adds opportunities for formative assessment as value-added elements to information resources. Commercial curriculum materials are created by designers who add such elements in the creation of textbooks and other learning materials. Educators both assign these resources and extend them with other activities and resources. 

So, if teachers already add elements to commercial content, what does an exploration of teacher as designer add. I would suggest two advantages – a) a purposeful approach and b) probably a broader collection of what these additional elements might be.

Connections – I see the discussion of teacher as designer as related to two recent popular modifications of traditional practice. The first is the movement to “ditch the textbook”. Searching on this phrase will provide multiple recommendations for books on the topic and recommended strategies. An alternative or at least related movement is OER (open educational resources). This movement proposes the use of digital and print resources that are in the public domain. The issue of the cost of commercial materials is a partial motivator for both movements. OER could apply to educational materials that are just available at no cost, but also proposes that educators can fashion effective learning resources themselves and possibly share them with each other. 

The second recent innovation is the concept of “flipping the classroom”. The core goal here is to free classroom time for interaction, guidance, and explanation and offer the exposure to content (think lecture) as an outside-of-class activity. I tend to think of this as the expectation that students should read the textbook before coming to class, but I admit this is a bit cynical. The idea is that teacher presentations need not be required to take up valuable class time. Most often implementation requires the preparation of video content made available to students and expected to be viewed before coming to class.

In addition to saving class time, video can be argued to offer other advantages – e.g., students can review if necessary, when content is viewed can be determined by the individual learner. Designing a resource for independent learning (a video in this case) allows and requires some different considerations. My personal interest is in adding elements to video that can individualize the learner experience (more on the specifics when I discuss layering). Such individualization is not possible in a group setting or if possible far less efficiently. 

Layering – I use “layering” as a way to describe the specific elements that differentiate an information source and an educational resource. I am interested in both how these differentiating elements are intended to influence the cognitive activities of the learner and how these elements can be added in a digital environment (e.g., web pages, YouTube videos). My interest extends to one more important issue. How can designers (teachers) add these elements without violating the copyright and possibly revenue generating expectations of the content creators (e.g., think the inclusion of ads on a web page)? The copyright issues do not necessarily apply in all layering opportunities, but would be relevant when a teacher finds web content (video, or text/images) that would be useful as a learning resource.

The approaches I emphasize in my writing focus on online services that allow an educator to designate an information resource and then add elements to these resources for the purpose of improving the effectiveness of the original resources. The service then basically creates a layer that is combined with the original content and sent to the learner online in way that does not impact whether ads are displayed or hits are recorded if the content creator receives compensation based on how many times his/her content is viewed. Aside from the legal and ethical issues, the services simply offer the educator as designer ways to improve the educational value of the targeted resources.

I can make this concept more concrete and I understand that it is important to get to the level of just what this looks like. First, what are these elements I keep talking about. My favorite example is a question. Questions are versatile and offer ways to encourage many important cognitive activities – what do you already know about this topic, did you understand what you just read or saw, can you think of a personal example of the concept just described, on and on. Other examples available from the services I have investigated include – comments and annotations (simply a way for the designer to offer additional information, link to additional content, or suggest an application of an important concept), highlighting, and discussion prompts resulting in the recording of the thoughts of multiple readers/viewers. These systems may allow the collection of the student responses to these prompts for educator review and possible evaluation. Different services depending on cost (some are free) and the type of online material they are designed to support (text/images vs. video) offer different elements and capabilities.

My writing – My book explains these concepts and explores the more general process of design. The topics attempt to create a mindset for educators attempting to show that learning happens because of the cognitive activities of learners and while teachers cannot control these processes there are ways to influence and change the probability these necessary internal processes happen by providing learners specific external tasks. Topics may be as specific as what are the benefits of questions and what types of questions influence specific cognitive processes. How can learners generate questions themselves and use them for review? 

Of course, I would like educators to spend the $3 necessary to acquire my Kindle book. However, if these ideas are intriguing and you are not interested in the book, I provide some videos demonstrating a variety of the online services I recommend. If you are interested in exploring, the videos should get you started with both paid and free layering services. 

Loading