
Editing Video Using YouTube
Everyone seems to be familiar with YouTube. Opinions on this video service are mixed and many schools block the site because much of the content has little educational value. Like so many online services, YouTube makes no effort to shape itself to the needs of a particular market and this is one of the realities one must accept when using the service. Google has made an effort creating a channel focused on education and also a a way to access videos appropriate to educational setting within a protected environment.
Our focus here is not so much on viewing videos, but on using YouTube to edit video. YouTube offers capabilities beyond the well known opportunity to upload videos for public viewing. If you have a YouTube account, you have access to tools for managing and editing your video content. The editing features cover the basics. Individual videos can be trimmed to focus on the most informative or interesting segments. Characteristics of the imagery, contrast and brightness, can be improved. Video content can be rotated so that it plays in the appropriate orientation (What? You never turned your camcorder sideways because this view looked better to you.). You can even reduce camera shake; a common problem because most of us capture video without the use of a tripod. Multiple segments can be combined into a single file and linked by transitions.
Of course, the intent is that you will share the final product through YouTube. It turns out that this is not mandatory, you can upload segments, create a final product, and then download this product without offering your video to the public.
Basic tutorial - Here is a basic description of the basic steps involved in editing video within YouTube.
1. To edit video in YouTube, you need an account. To request an account, you go to the YouTube page and select the option allowing you to create an account (red box). While on this page, note the link allowing you to upload video (green box). When you are ready to give the YouTube video editing process a try, you will first need to upload some video segments.

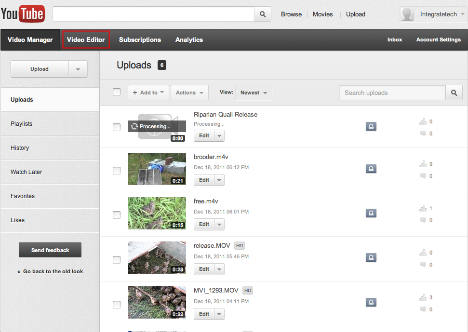
2. The individual videos you upload are accessible from the Video Manager. You will need to sign in to your account to access the manager. From the manager, you can access the video editor tools (red box).
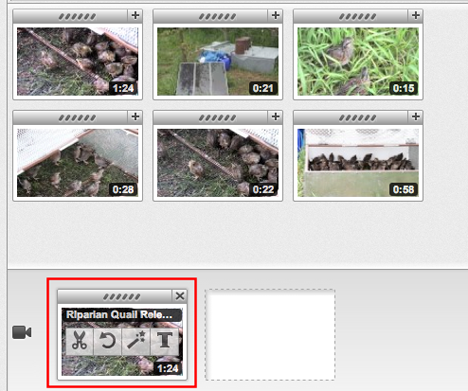
3. To edit individual video files, move the file to the time line. When the cursor is moved over a file in the time line, the editing tools appear (red box).
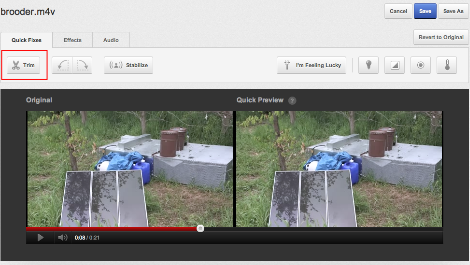
4. If the editing requires selected a specific portion of the file (trim), the scissors tool will display the video complete with sliders. Position the sliders to identify the desired content and then click “done”.
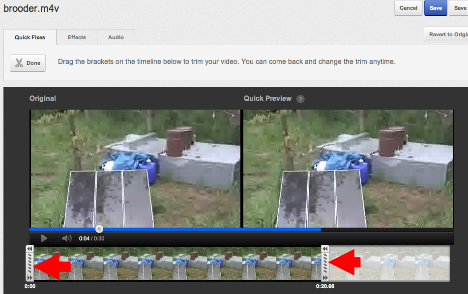
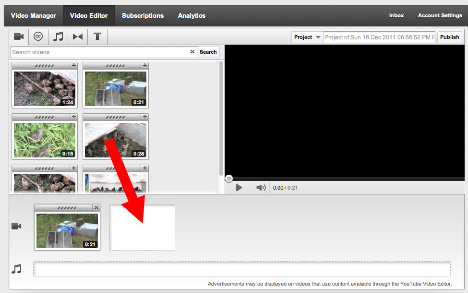
5. The following image shows the three key sections of the editing interface - the file browser, the viewer, and the timeline. To build a final product from individual video segments, drag the segments onto the timeline in the desired order. Select “Publish” and YouTube combines the video segments (and other modifications such as transitions and music you have added) into a new video file. You can make this file visible through YouTube or download it to your computer.
We have created a video so you can view the process we have just described. You will note some slight differences from the written instructions we provide here. This is a new service from Google and change is constant. We also provide the video we created so you have a feel for the products you can create editing video in YouTube.
Tutorial - video editing with YouTube [video]
Movie created in the tutorial [video]