Images from the desktop
Screen Capture
Screen capture is the process of saving the screen image or part of the screen image (even if the screen contains text) as a graphics file. The process is very much like taking a picture of the screen. We would suggest that knowing how to capture images from digital devices represents a valuable skill for educators.
Screen captures can be used for many different purposes. One important use is capturing screens from application programs to use in material that explains to others how to use those programs. Many images we use here were captured from the screen for this purpose. Teachers may have opportunities to use this technique to prepare instructional materials for their students. If you wanted to prepare handouts explaining to students how to use a new software program, this would be a useful way to display what the computer screen would look like at certain critical points. There are other reasons to be able to capture the screen. Sometimes it is helpful to show someone else, for example someone from tech support, what a problem “looks like”. You might capture the screen to store proof when making an online purchase (gamers do a similar thing to prove they have reached a given milestone in a game).
Screen capture capabilities are built into the Macintosh and Windows operating systems. In Windows, you use the keyboard command Print Screen to copy the entire screen and Alt-Print Screen to copy the active window. The copy is saved to the clipboard, a computer memory buffer from which it can be loaded into a paint program such as Windows’ own Paint. The Macintosh equivalent is Command-Shift-3. Executing this command should result in the reassuring sound of a camera shutter click that lets the user know the computer has taken the requested action. Screen capture for the Macintosh works a little different in that this computer saves the screen image as a file on the computer’s hard drive rather than to a clipboard. A paint program can then be used to load and work with the captured image. Command-Shift-4 is typically more useful and changes the cursor to crosshairs that allows a selected area of the screen to be selected and stored as a png file. Once the crosshairs appears, you drag to the opposing side of a rectangle that surrounds the area of the screen you want to capture. These capture techniques are easy to practice and learn. Screen capture is also possible with the Chrome OS and on devices such as the iPad and smartphones and we offer some additional information on these devices at the end of this resource.
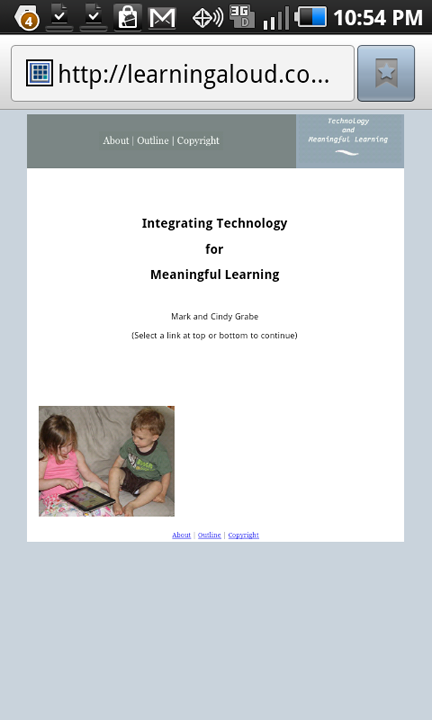
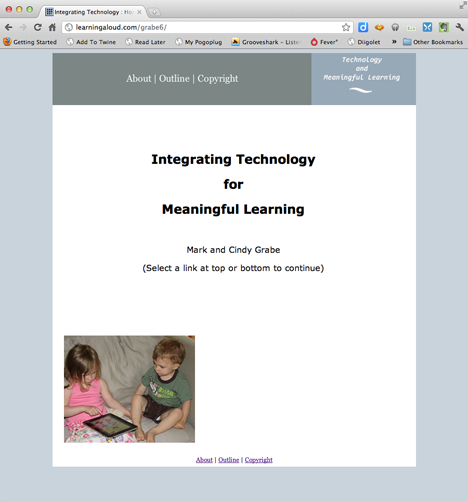
Some additional information about screen capture Screen capture: The images that follow are screen captures of the same web site captured with the Macintosh, iPad, and Samsung Fascinate (a smartphone using Android OS 2.2). To capture an image on the iPad (and the iPhone) press and hold the “home button” located at the bottom center and the on/off (sleep/wake) key on top of the device. You should hear a “shutter” sound when the image is captured. Be careful with this technique on the iPhone, holding the two keys longer resulted in a different action. To capture an image of the screen on the Samsung (and some of the other phones running the Android 2.2 OS) use the back button (base of the phone) and the power button (sleep/wake). Images on the iPad are stored in “Photos” and images on the Samsung are stored in the “Gallery”.
Macintosh Screen Capture (resized)
iPad Screen Capture (resized)

Smartphone Screen Capture (resized)