Tutorial - Blogger
Introduction
It would not be practical to offer a detailed introduction for all of the blog tools you might want to investigate. Blogger.com has been selected because of the popularity of this site and because of the ease of use.
Setting Up a Blogger Account
The processes begins from the Blogger start page.
Step 1 - Create a Google account
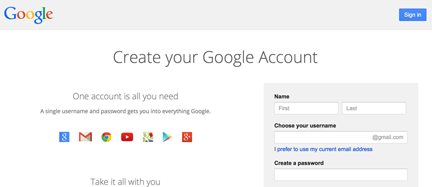
Blogger has been purchased by Google. So, you need a Google account to operate a blog. There are two ways of obtaining an account.
a) My recommendation is to establish a Google account by first establishing a Google Gmail account. Gmail is another free service from Google. It will be convenient to use the Google email address and ID when setting up a Blogger account.
Gmail is blocked from some school locations so my preferred approach is not always feasible.
b) If you do not have an existing account (e.g., a Gmail account), you can create an account to use any of the Google services - https://accounts.google.com/signup.

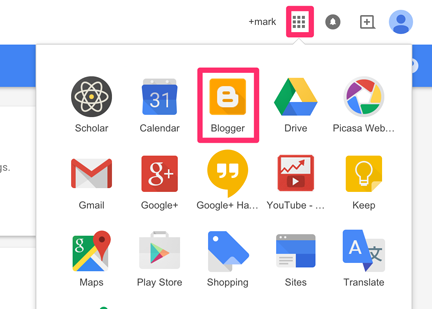
Once an account has been established, you can select the Google service you want to use. From any Google service, you should be able to locate a grid icon and selecting this icon will reveal all services.

Step 2: Submit a name for the blog
Selecting the Blogger icon will generate a screen with a button allowing you to create a new blog.

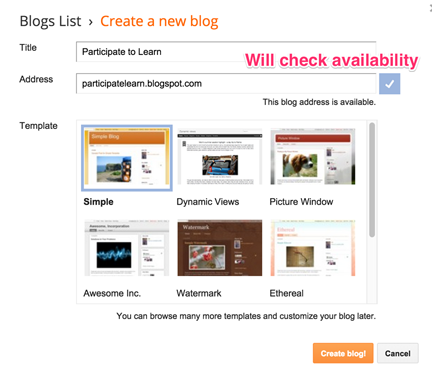
To create a blog, you enter a title, select a template, and generate the address for the blog. If you select a short title, it probably makes sense to use that same title or something similar as the first part of your blog's address. If you do this, note that you should omit the spaces separating words in your title. Also note that the address for your blog will be the "word" you enter plus .blogspot.com --> nameselected.blogspot.com When you create the address, Google will make certain that the address is not already in use. If someone has already claimed the address, you will be informed and create an alternative.

Once you fill in the requested information and select the button to continue, Blogger will create your blog.

The one additional contribution you will be asked to make to this process involves the selection of a "theme". One of the efficiencies of blogging is that you typically spend less time designing the appearance of your site. Blogger offers you multiple themes - pre-established color patterns, elements making up the appearance of what appears on the screen - and you select the one you want. Note that your original selection does not have to be permanent. You can modify the theme even when the blog is available to others. This will not delete the content you have added.
Step 3: Commence blogging

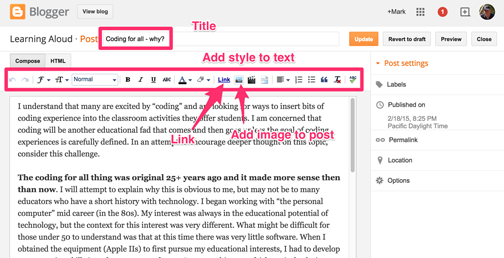
You can now begin authoring. A blog post has a title and the associated content. You fill in the blanks. Above the "textbox" in which you insert the content, you will see the composition tools you use in performing some of the functions you are used to using in a word processing program (e.g., bold text, add numbered lists). You will also find tools for adding images and for linking to sites outside your blog.
Under the "textbox" you will find buttons for saving your material (this is so you can do some work now and return later to finish) and for publishing (select this button and the material is available to everyone).
Step4: Day to Day
Once your blog exists, future connections to blogger.com will take you to what is called the ''Dashboard''.

As you can see from the representation that appears above, the Dashboard is the starting point for many you important activities. From here you can:
- view your blog,
- jump to the form allowing you to create a new post,
- work with existing posts (Posts) - edit, delete,
- manipulate important settings associated with your blog (Settings),
- modify your blog layout (Layout) - the appearance of your blog, or
- check to see how many views your posts have received.
Access to these controls appears in the left hand panel of the dashboard. Our final segment will focus on some Settings you may want to consider.
Step 5: Some characteristics you control
While Blogger is easy to set up and use, there are some important settings we think you should understand. You access these settings by selecting the settings link from the Dashboard and then selecting one of the headings on the settings page. This brief exposure will only identify a few of the settings you may want to consider. The "Help" link on the Dashboard will take you to more information.
Comments (an option available from Settings - Posts and Comments)
Allowing comments is one way to make a blog participatory. If have had the opportunity to explore blogs, you have probably run across comments. These are remarks attached to a post by someone other than the original blogger. Ideally, this is an opportunity to generate a little give and take.
It is important to consider whether you want to allow comments and under what conditions for two reasons:
- not everyone who provides comments does so in a manner that is helpful and appropriate
- some take advantage of commenting to spam blogs - i.e., they add comments that may be unrelated and include links to products or services they are promoting.
Given these issues, comment settings offer the blogger some options.
The Show/Hide option allows control of whether readers will be allowed to comment.
The Who can comment option allows the blogger to allow anyone to comment, to allow other registered bloggers to comment (the default - individuals will need to have a Blogger account and login before offering a comment on your blog), or to designate individuals who will be allowed to comment (this is the same as a group blog and names are added using the Permissions tag).
Access (Under Settings - Basic)
Blogger offers an author control over who can access the author's work. Limiting access to specific users may be important in an educational setting. See our previous comments on how to limit access in blogger.
